Advanced Frontend Architecture & DX: Using Localhost Tunnels for Faster Development Loops
Discover how to optimize developer experience with localhost tunnels. Learn to build visual regression pipelines, sync feature flags, and test micro-frontends locally.
Quick answer
Building Advanced Localhost Tunnel Pipelines for Frontend: localhost tunnel answer
A localhost tunnel gives your local app a public HTTPS URL without opening router ports, which is useful for demos, QA, mobile testing, and provider callbacks.
How do I expose localhost without opening ports?
Use a reverse HTTPS tunnel. Your machine connects outbound to the tunnel service, and the public URL forwards requests back to your local app.
When should I use a localhost tunnel?
Use one for webhook testing, OAuth callbacks, client demos, QA previews, mobile device checks, and short-lived development reviews.
Frontend feedback loops slow down when every check needs a deploy. Waiting on a preview environment or a CI pipeline just to see a visual change on a phone, or to test a micro-frontend against a real shell, adds friction and cost.
A localhost tunnel is one way to shorten that loop. A small agent on your machine makes an outbound connection to a relay, and the relay gives your local server a public HTTPS URL. Common options are ngrok, Cloudflare Tunnel (cloudflared), and localtunnel. Their trade-offs differ enough to shape which patterns below work for you.
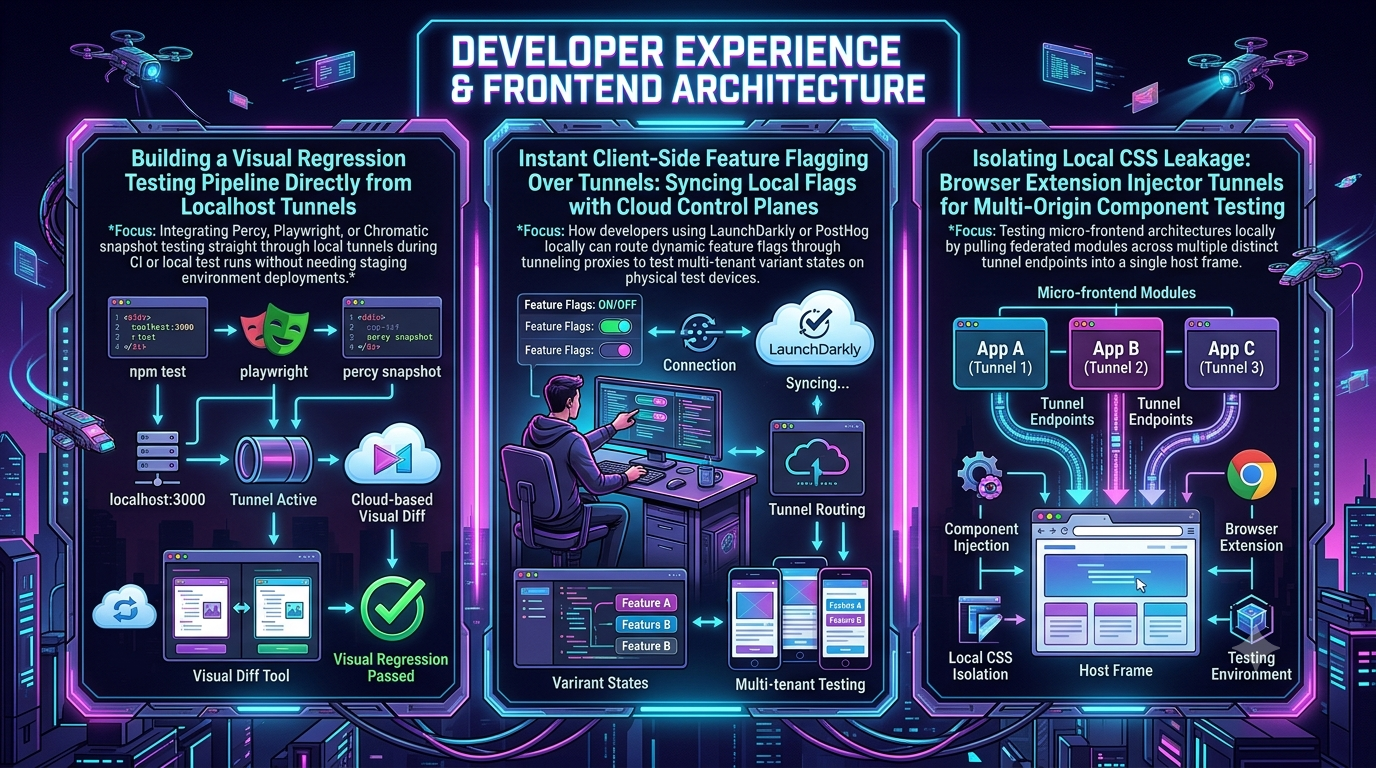
This article covers three patterns and, for each, where the tunnel helps and where it does not:
- Running Playwright visual regression tests against a tunneled dev server
- Testing feature flags on real devices
- Overriding a micro-frontend remote in a deployed shell, with Shadow DOM isolation
Choosing a Tunnel: What the Docs Say (October 2026)
Check these limits before you design a workflow around a tunnel.
| Tool | Stable URL | Notable limits | Best for |
|---|---|---|---|
| ngrok (free) | One assigned dev domain (e.g. your-name.ngrok-free.app); you can’t choose the name |
Interstitial warning page on HTML browser traffic; custom or reserved domains need a paid plan | Device testing, webhooks, short demos |
| Cloudflare Quick Tunnel | No: new trycloudflare.com hostname each run |
No SLA, 200 in-flight requests per tunnel, no Server-Sent Events | Throwaway sharing of a plain HTTP app |
| Cloudflare named Tunnel | Yes, on your own domain | Needs a Cloudflare account and domain setup | Longer-lived, stable endpoints |
| localtunnel | Random subdomain | Package inactive (latest npm release is about three years old); public instance is best-effort | Quick, low-stakes experiments |
Cloudflare documents Quick Tunnels as testing-only, with a hard cap on concurrent requests and no SSE support. If your app streams events over SSE (a dev dashboard, an AI chat UI), a Quick Tunnel will break it. Use a named tunnel or another provider.
On ngrok’s free plan, an interstitial page is injected in front of HTML browser traffic to deter phishing. It sets a cookie that lasts 7 days once accepted. Requests that include an ngrok-skip-browser-warning header (any value) bypass it, as does any paid plan. This matters later: scripts and assets loaded by a page can receive the interstitial HTML instead of the file you expected.
1. Visual Regression Testing Against a Tunneled Dev Server
Playwright has built-in visual comparison through expect(page).toHaveScreenshot(). The older toMatchSnapshot() path still works, but Playwright’s docs steer you to toHaveScreenshot() for screenshots.
When you need a tunnel and when you don’t
If Playwright runs on the same machine (or CI runner) as your dev server, it can reach localhost directly. Playwright’s webServer config can even start the server for you. A tunnel adds nothing there.
Cloud visual services such as Percy and Chromatic also don’t need to reach your machine. Their Playwright integrations (@percy/playwright with percy exec, and @chromatic-com/playwright) capture snapshots or an archive of the UI during your local test run and upload them for comparison and review. Percy renders those snapshots in its own cloud.
A tunnel earns its place when something remote has to load your local build. Examples are a hosted browser grid, a real-device cloud, or a teammate reviewing a work-in-progress branch. The example below shows the mechanics. The same pattern works when the thing hitting the tunnel is a remote browser instead of a local one.
Implementation: Playwright + the official ngrok SDK
The official Node SDK is @ngrok/ngrok. It needs no separate binary and exposes ngrok.forward() for starting a listener.
npm install --save-dev @playwright/test @ngrok/ngrok
npx playwright install
playwright.config.ts
import { defineConfig } from '@playwright/test';

const { PLAYWRIGHT_BASE_URL, TUNNEL_USER, TUNNEL_PASS } = process.env;

export default defineConfig({
  testDir: './tests/visual',
  use: {
    baseURL: PLAYWRIGHT_BASE_URL ?? 'http://localhost:3000',
    // Skips ngrok's free-plan interstitial for requests made by the test browser
    extraHTTPHeaders: { 'ngrok-skip-browser-warning': '1' },
    // Answers the Basic Auth challenge configured on the tunnel below
    ...(TUNNEL_USER && TUNNEL_PASS
      ? { httpCredentials: { username: TUNNEL_USER, password: TUNNEL_PASS } }
      : {}),
  },
  expect: {
    toHaveScreenshot: { maxDiffPixelRatio: 0.02 }, // allow up to 2% differing pixels
  },
});
run-visual-tests.mjs
import ngrok from '@ngrok/ngrok';
import { spawnSync } from 'node:child_process';

const port = Number(process.env.PORT ?? 3000);
const { TUNNEL_USER, TUNNEL_PASS } = process.env;

const listener = await ngrok.forward({
  addr: port,
  authtoken_from_env: true,                        // reads NGROK_AUTHTOKEN
  basic_auth: `${TUNNEL_USER}:${TUNNEL_PASS}`,     // don't leave a public dev server open
});

try {
  console.log(`Tunnel up at ${listener.url()}`);
  const result = spawnSync('npx', ['playwright', 'test'], {
    stdio: 'inherit',
    env: { ...process.env, PLAYWRIGHT_BASE_URL: listener.url() },
  });
  process.exitCode = result.status ?? 1;
} finally {
  await listener.close(); // always tear the tunnel down
}
tests/visual/dashboard.spec.ts
import { test, expect } from '@playwright/test';

test('dashboard matches baseline', async ({ page }) => {
  await page.goto('/dashboard');

  // Wait on something the user can see, not on network quiet
  await expect(page.getByRole('heading', { name: 'Dashboard' })).toBeVisible();

  await expect(page).toHaveScreenshot('dashboard.png', {
    fullPage: true,
    mask: [page.locator('.timestamp-badge')], // mask volatile regions
  });
});
Three changes from common examples:
- Don’t rely on
waitForLoadState('networkidle'). Playwright’s API docs label that state discouraged for testing and recommend web assertions such astoBeVisible(). - Mask volatile content instead of hiding it with injected script.
toHaveScreenshot()takes amaskoption for timestamps, avatars and similar regions. Screenshot assertions also disable animations by default and wait until two consecutive captures match before comparing. - Keep baselines environment-consistent. Fonts and anti-aliasing differ across operating systems, so generate and compare baselines in the same environment (a pinned container image is the usual approach). Update baselines deliberately with
npx playwright test --update-snapshots.
What a tunnel does and doesn’t buy you
- Benefit: a public HTTPS URL for tools that can’t see your machine, without a deploy.
- Not a benefit: it won’t make a flaky test deterministic. Flakiness usually comes from animation, fonts, and live data, which masking and stable fixtures fix.
- Cost: a free-plan interstitial, request limits, and the fact that your dev server is reachable by anyone who has the URL.
2. Testing Feature Flags on Real Devices
Feature-flag behaviour on a real iPhone or Android phone differs from desktop emulation in touch handling, viewport quirks, WebView behaviour and network conditions. A tunnel makes your local build reachable from the phone, even on cellular, with nothing to deploy.
What the tunnel carries and what it doesn’t
This is easy to get wrong. The tunnel serves your app’s HTML and JavaScript to the phone. Flag values travel on a separate path: the flag SDK talks directly from the device to the vendor’s cloud, with no tunnel involved. Changing a flag in a console never needs to pass through your tunnel. The tunnel only matters if you proxy flag traffic through your own server.
How quickly the page reacts depends on the SDK:
- LaunchDarkly’s JavaScript client-side SDKs make an initial connection through a polling endpoint, and some (the React Web SDK, for example) open a streaming connection by default. You subscribe to changes with listeners such as
client.on('change:flag-key', …). - PostHog’s JS library fetches flags in the background on each page load and caches the values. Its documented way to refresh is
posthog.reloadFeatureFlags(). UseonFeatureFlagsto wait until the first fetch finishes.
Example: reacting to LaunchDarkly flag changes
// useFlag.ts
import { useEffect, useState } from 'react';
import { initialize } from 'launchdarkly-js-client-sdk';

const client = initialize(import.meta.env.VITE_LD_CLIENT_ID, {
  kind: 'user',
  key: 'dev-device-01',
});

export function useFlag(key: string, fallback = false) {
  const [value, setValue] = useState(fallback);

  useEffect(() => {
    let active = true;
    const refresh = () => active && setValue(client.variation(key, fallback));

    client.waitForInitialization(5).then(refresh).catch(() => {});
    client.on(`change:${key}`, refresh);

    return () => {
      active = false;
      client.off(`change:${key}`, refresh);
    };
  }, [key, fallback]);

  return value;
}
export function Checkout() {
  const newCheckout = useFlag('new-checkout-v2');
  return newCheckout ? <ExpressCheckout /> : <LegacyCheckout />;
}
Use a dev or test environment’s client-side ID so flag toggles never touch production users.
Example: PostHog with explicit refresh
import posthog from 'posthog-js';

posthog.init(import.meta.env.VITE_POSTHOG_KEY, {
  api_host: 'https://us.i.posthog.com', // use https://eu.i.posthog.com for EU Cloud
});

posthog.onFeatureFlags(() => {
  console.log('new-checkout-v2:', posthog.getFeatureFlag('new-checkout-v2'));
});

// After changing a flag in the PostHog UI, pull the latest values
// (call from a button, an interval, or a visibilitychange handler):
posthog.reloadFeatureFlags();
Exposing the dev server to the phone
ngrok http 3000
On the free plan, ngrok assigns your dev domain automatically (you can’t pick the name). Open the printed https://…ngrok-free.app URL on the phone. You’ll see the interstitial once; accepting it sets a cookie that lasts 7 days.
Some dev servers reject requests with an unrecognised Host header. Vite has server.allowedHosts, and webpack-dev-server has allowedHosts. If the page loads from localhost but not through the tunnel, check this first.
Practical limits
- A Cloudflare Quick Tunnel is a poor fit if your own app uses SSE, because Quick Tunnels don’t support it.
- Hot module reload relies on a WebSocket back to the dev server. If the phone’s page loads but doesn’t live-update, check the tunnel and dev-server host settings.
- Don’t put real user data or production credentials behind a public tunnel.
3. Micro-Frontends: Overriding a Remote in a Deployed Shell
Module Federation lets independently built applications share code at runtime. Webpack 5 includes the original plugin, and Module Federation 2.0 adds a bundler-agnostic runtime, type hints for remotes, and runtime plugins through @module-federation/enhanced, which supports webpack and Rspack. The runtime exposes registerRemotes and loadRemote for adding remotes dynamically.
A common development problem: your remote works on its own, but you only see integration issues (style collisions, shared-dependency mismatches, auth-dependent behaviour) once it sits inside the real shell. One workaround is to keep the shell deployed, run only the remote locally behind a tunnel, and redirect the shell’s request for that remote’s entry file to the tunnel URL.
Why a tunnel rather than plain localhost
- Chrome began gating requests from public sites to local-network and loopback addresses behind a permission prompt (Local Network Access, starting in Chrome 142), and later releases extended the gating to WebSocket connections. A tunnel gives the remote a public HTTPS origin, so a deployed HTTPS shell isn’t making a public-to-loopback request.
- A deployed HTTPS shell loading plain HTTP content raises mixed-content problems. An HTTPS tunnel URL avoids that.
- A teammate can load the same override without being on your network.
Step 1: Configure the remote
// webpack.config.js (remote)
const { ModuleFederationPlugin } = require('@module-federation/enhanced/webpack');

module.exports = {
  mode: 'development',
  output: { publicPath: 'auto' }, // chunks resolve relative to wherever remoteEntry.js was loaded from
  devServer: {
    port: 8081,
    allowedHosts: ['.ngrok-free.app'],  // accept the tunnel's Host header
    headers: {
      // Restrict to the shell you are testing against rather than using '*'
      'Access-Control-Allow-Origin': 'https://app.example.com',
    },
  },
  module: {
    rules: [
      // Import scoped CSS as a string so it can be injected into a shadow root
      { test: /\.scoped\.css$/, type: 'asset/source' },
    ],
  },
  plugins: [
    new ModuleFederationPlugin({
      name: 'checkoutMFE',
      filename: 'remoteEntry.js',
      exposes: { './CheckoutWidget': './src/CheckoutWidget.tsx' },
      // Match the React version your shell actually runs
      shared: {
        react: { singleton: true, requiredVersion: '^18.0.0' },
        'react-dom': { singleton: true, requiredVersion: '^18.0.0' },
      },
    }),
  ],
};
Step 2: Isolate styles with Shadow DOM, and know its limits
Shadow DOM stops the host page’s selectors from reaching into your component, and yours from leaking out. It is not total isolation:
- Inherited properties cross the boundary.
color,font-family,line-heightand similar properties set on ancestors outside the shadow root still apply inside it. - CSS custom properties cross the boundary too. That is useful for theming, but it means a host’s
--primarycan change your component. all: initialon:hostresets inherited properties, but it does not reset custom properties. Reset those explicitly if you need to.// src/CheckoutWidget.tsx import React from 'react'; import { createRoot, type Root } from 'react-dom/client'; import styles from './CheckoutWidget.scoped.css'; // loaded as a string via asset/source class IsolatedCheckoutElement extends HTMLElement { private root?: Root; connectedCallback() { // Guard: attachShadow throws if called twice, and connectedCallback can fire again on re-attach const shadow = this.shadowRoot ?? this.attachShadow({ mode: 'open' }); if (!this.root) { const style = document.createElement('style'); style.textContent = styles as unknown as string; const mount = document.createElement('div'); shadow.append(style, mount); this.root = createRoot(mount); } this.root.render(<CheckoutContent />); } disconnectedCallback() { this.root?.unmount(); this.root = undefined; this.shadowRoot?.replaceChildren(); } } function CheckoutContent() { return ( <div className="checkout-container"> <h3>Checkout (federated module)</h3> <button className="primary-button">Pay securely</button> </div> ); } if (!customElements.get('mfe-checkout-widget')) { customElements.define('mfe-checkout-widget', IsolatedCheckoutElement); } export default function CheckoutWidget() { return React.createElement('mfe-checkout-widget'); }/* CheckoutWidget.scoped.css */ :host { all: initial; /* stop inherited properties from the host page */ display: block; } .checkout-container { font-family: system-ui, sans-serif; }
Because Shadow DOM contains your CSS, you will no longer see host-style collisions in this component. Test your inherited-property and custom-property assumptions with the real shell, since that is where leakage still happens.
Step 3: Redirect the shell’s request to your tunnel
Start the remote and tunnel it:
npm start            # remote on :8081
ngrok http 8081      # note the https://…ngrok-free.app URL
Then use a small Chrome extension built on declarativeNetRequest, which blocks or modifies requests using declarative rules and supports redirecting a request. It needs the declarativeNetRequest permission plus host_permissions for the origins involved.
manifest.json
{
  "manifest_version": 3,
  "name": "MFE Local Override",
  "version": "0.1.0",
  "permissions": ["declarativeNetRequest"],
  "host_permissions": ["https://app.example.com/*", "https://*.ngrok-free.app/*"],
  "declarative_net_request": {
    "rule_resources": [
      { "id": "mfe_override", "enabled": true, "path": "rules.json" }
    ]
  }
}
rules.json
[
  {
    "id": 1,
    "priority": 1,
    "action": {
      "type": "redirect",
      "redirect": { "url": "https://your-name.ngrok-free.app/remoteEntry.js" }
    },
    "condition": {
      "urlFilter": "||app.example.com/assets/mfe/checkout/remoteEntry.js",
      "resourceTypes": ["script"]
    }
  },
  {
    "id": 2,
    "priority": 1,
    "action": {
      "type": "modifyHeaders",
      "requestHeaders": [
        { "header": "ngrok-skip-browser-warning", "operation": "set", "value": "1" }
      ]
    },
    "condition": {
      "requestDomains": ["your-name.ngrok-free.app"],
      "resourceTypes": ["script", "xmlhttprequest"]
    }
  }
]
Rule 2 handles the free-plan interstitial. Without it, the browser can receive the warning page’s HTML where it expects remoteEntry.js, and the remote fails to load. After setting this up, confirm in DevTools’ Network panel that the header is actually present on the tunnel requests. If your remote loads other files through fetch (such as a manifest JSON), add xmlhttprequest to rule 1’s resourceTypes as well.
Static rules like these are fixed at install time. If your tunnel hostname changes between sessions (a Cloudflare Quick Tunnel, for example), use dynamic rules instead. Those persist across browser sessions and extension upgrades.
Safety notes for this pattern
- The override only affects the browser with the extension installed. Don’t point a shared or production environment at a developer’s laptop.
- Your remote is reachable by anyone with the tunnel URL. Because script subresources have no login page to answer a challenge, an IP allow-list (ngrok’s
restrict-ipspolicy action) usually fits better than Basic Auth here. - If the shell and the remote share
singletondependencies, version mismatches (for example, a different React major version) will surface as runtime errors. Fix those in your shared config, not by loosening the tunnel.
Summary
| Goal | Where a tunnel helps | Where it doesn’t | Key tools |
|---|---|---|---|
| Visual regression | A remote browser, device cloud or reviewer needs to load your local build | Local Playwright, Percy and Chromatic already work against localhost |
Playwright toHaveScreenshot(), @ngrok/ngrok, Percy, Chromatic |
| Feature flags on devices | The phone needs to load your local app | Flag values flow device-to-vendor, not through your tunnel | LaunchDarkly, PostHog, ngrok |
| Micro-frontend override | A deployed HTTPS shell needs a public HTTPS remote | Shadow DOM doesn’t block inherited or custom properties | Module Federation 2.0, declarativeNetRequest, Shadow DOM |
Security checklist for tunnel workflows
- Authenticate or restrict every tunnel. ngrok supports Basic Auth, OAuth, and IP restrictions through its Traffic Policy engine, and
@ngrok/ngrokaccepts options likebasic_authandtraffic_policy. Cloudflare Quick Tunnels have no authentication by default, butcloudflaredoffers an--allowed-mailoption that requires visitors to verify an email address with a one-time PIN. - Keep tokens out of source control. Read
NGROK_AUTHTOKEN(or Cloudflare credentials) from environment variables or a secret manager, and rotate them on a schedule your team sets. - Use short-lived tunnels. Close listeners in
finallyblocks (as in the runner above) or in signal handlers, so a crashed script doesn’t leave a dev server exposed. - Never tunnel anything holding production data or credentials. Use fixtures and development environments.
- Check the free-tier limits before building on them. Interstitials, domain restrictions, request caps and missing SSE support are the usual surprises.
Conclusion
A tunnel is a good tool when something remote has to reach your local build. That covers real devices, hosted browsers, deployed shells and reviewers. It is not needed when everything already runs on one machine, and it doesn’t change how flag SDKs or screenshot services communicate. Match the pattern to the problem, check your tunnel’s current limits, and lock the endpoint down before you share the URL.
References
- ngrok JavaScript SDK (
@ngrok/ngrok) - ngrok free plan limits and interstitial page
- ngrok network security and IP restrictions
- Cloudflare Quick Tunnels
- Playwright
SnapshotAssertions(usetoHaveScreenshot()) - Chromatic for Playwright
- Percy and Playwright integration guide
- PostHog web feature flags
- LaunchDarkly client-side vs. server-side SDK behaviour
- LaunchDarkly: subscribing to flag changes
- Module Federation runtime API
- Chrome
declarativeNetRequestAPI - Chrome Local Network Access
- Shadow DOM and inherited styles (Open Web Components)
- localtunnel maintenance status (Snyk)
Related InstaTunnel pages
Continue from this article into the most relevant product guides and workflows.
Related Topics
Keep building with InstaTunnel
Read the docs for implementation details or compare plans before you ship.