Escaping CGNAT: Exposing Local Services Using Pure IPv6 Tunnels
Quick answer
Escaping CGNAT: Exposing Local Services using Pure IPv6: localhost tunnel answer
A localhost tunnel gives your local app a public HTTPS URL without opening router ports, which is useful for demos, QA, mobile testing, and provider callbacks.
How do I expose localhost without opening ports?
Use a reverse HTTPS tunnel. Your machine connects outbound to the tunnel service, and the public URL forwards requests back to your local app.
When should I use a localhost tunnel?
Use one for webhook testing, OAuth callbacks, client demos, QA previews, mobile device checks, and short-lived development reviews.
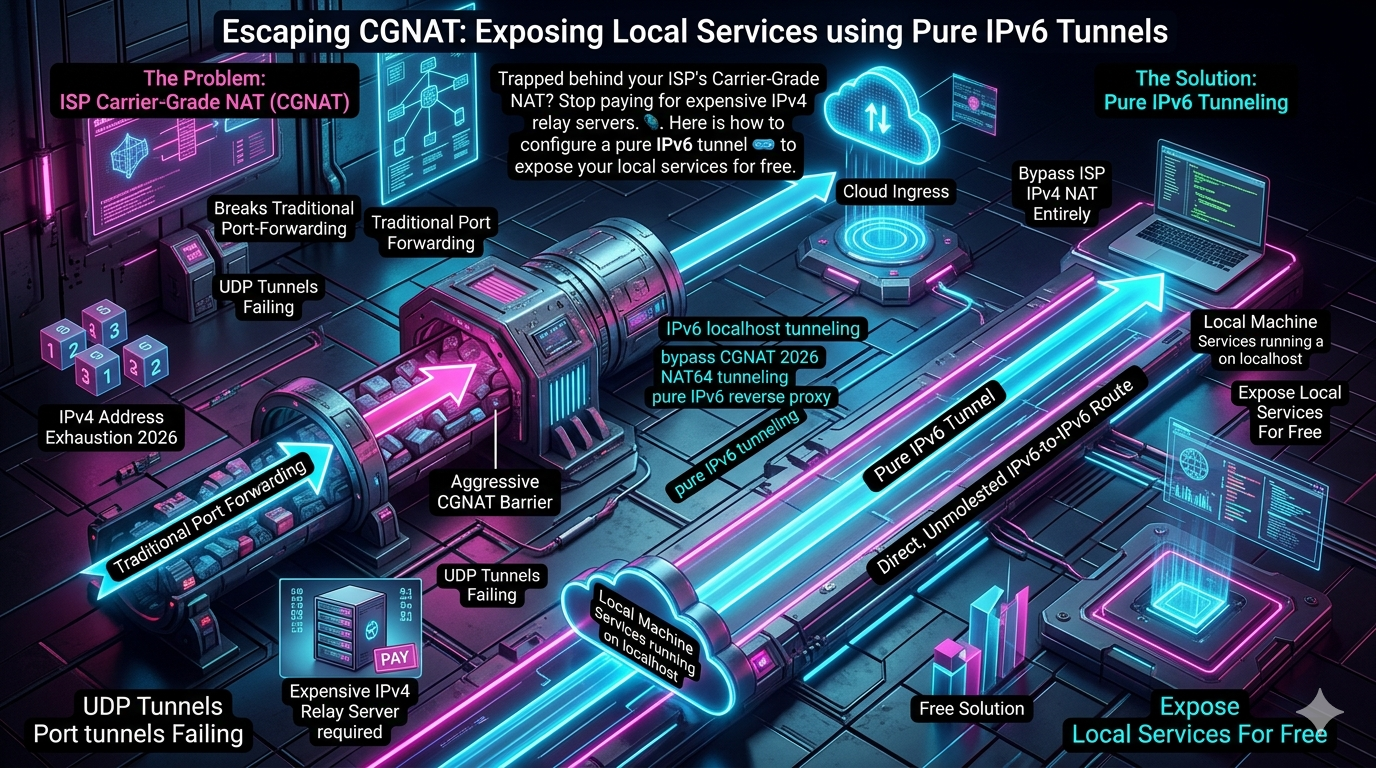
Trapped behind your ISP’s Carrier-Grade NAT? Stop paying for expensive IPv4 relay servers. Here is how to configure a pure IPv6 tunnel to expose your local services — for free.
The Problem No One Warned You About
The modern internet has a dirty secret: the public IPv4 address your home router reports to you is almost certainly not yours. Millions of residential and commercial subscribers share a single upstream IP with hundreds or thousands of neighbours, courtesy of Carrier-Grade NAT (CGNAT) — a stopgap measure their ISPs quietly deployed years ago and have no financial incentive to undo.
The root cause is straightforward. IPv4’s 32-bit architecture supports only 4.3 billion unique addresses, a ceiling that was breached permanently beginning in 2011 when IANA exhausted its global free pool. The regional registries followed in rapid succession: APNIC (Asia-Pacific) in April 2011, RIPE NCC (Europe) in September 2012, LACNIC (Latin America) in June 2014, and ARIN (North America) in September 2015. Today, not even the smallest allocable block — a /24, containing just 254 usable addresses — is available directly from a registry without a transfer.
The downstream consequences are now baked into the economics of the internet. On the secondary market, a single IPv4 address costs between $35 and $55 to purchase outright as of 2025, and leases run $0.25–$0.55 per IP per month depending on block size and regional demand. That scarcity has rippled into cloud pricing as well: AWS began charging $0.005 per public IPv4 address per hour — roughly $3.60/month or $43.20/year per address — effective February 1, 2024, citing a greater than 300% increase in their own acquisition costs over the previous five years. For teams running dozens of cloud resources with public IPs, the bill adds up fast.
Meanwhile, the protocol that was designed to make all of this irrelevant — IPv6 — remains in a state of uneven, frustratingly slow rollout. Global adoption sits at roughly 45–47% as of mid-2025 based on Google’s traffic measurements, with dramatic regional variance: France leads at approximately 80%, followed by Germany (~75%) and India (~74%), while large portions of the world, particularly in Africa and parts of Asia, remain below 20%. The United States only crossed the 50% threshold for Google traffic in early 2025. Industry analysts note that complete global migration to IPv6 may not occur until 2045.
In practical terms: your ISP has run out of IPv4 addresses to give you, the addresses available on the market are expensive, and the transition to IPv6 is happening — just not fast enough to have already fixed your home lab.
This article shows you how to route around all of it.
1. The Mechanics of the Ingress Crisis: Anatomy of CGNAT
To understand why a pure IPv6 approach is the most efficient fix, you need to understand exactly where inbound connections die under CGNAT.
The NAT444 Bottleneck
Standard home networks use a single layer of Network Address Translation (NAT44), converting private addresses (e.g., 192.168.x.x or 10.x.x.x) to one distinct public WAN IP. CGNAT adds a third layer, creating a NAT444 topology:
[Local Server: 192.168.1.50]
       │
       ▼ (Home Router NAT)
[WAN Interface: 100.64.x.x  ← CGNAT Shared Pool per RFC 6598]
       │
       ▼ (ISP Carrier-Grade NAT)
[Public Core IP: 203.0.113.1] ──► Public Internet
Your router is assigned an address from the 100.64.0.0/10 block, reserved by the IETF under RFC 6598 exclusively for Carrier-Grade NAT. When an external client attempts to initiate a connection to your public-facing endpoint, the packet hits the ISP’s stateful firewall translation table. Because no outbound state entry exists for the inbound port, the ISP’s hardware drops the packet immediately — before it ever reaches your router. Classic port forwarding is entirely inert in this environment.
Why Legacy Workarounds Fall Short
Before designing a clean solution, it’s worth understanding why common workarounds fail at scale:
Purchasing a static IPv4 from your ISP — if it’s even available — carries real monthly overhead, and on cellular, LTE, 5G fixed-wireless, or satellite connections, a dedicated public IPv4 is typically unavailable regardless of what you’re willing to pay.
SaaS relay agents like ngrok, Localtonet, or Cloudflare Tunnels (via cloudflared) work by establishing persistent outbound TCP connections to a cloud edge. They’re fine for basic HTTP webhooks. Their free tiers impose restrictive bandwidth limits, enforce concurrent connection throttles, and frequently drop raw TCP/UDP streams — breaking real-time applications, custom database ports, game servers, and anything non-HTTP.
VPN relay servers (WireGuard or OpenVPN on a rented VPS) avoid some of those restrictions, but introduce double-encapsulation overhead. Your effective throughput becomes bounded by the cheap VPS’s CPU and the cloud provider’s egress data billing — often expensive the moment traffic is meaningful.
2. The Pure IPv6 Alternative: Zero-NAT Architecture
IPv6 was designed with address exhaustion as an explicit non-goal. The protocol provides 3.4 × 10³⁸ unique addresses — enough to assign billions of addresses to every grain of sand on Earth. In a properly configured IPv6 network, address translation becomes structurally unnecessary.
Global Unicast Addresses (GUAs)
Every interface on a correctly configured IPv6 network receives a Global Unicast Address (GUA) — a globally routable, unique address on the public internet, typically beginning with 2001: or 2400:. Because ISP-level CGNAT operates exclusively within the IPv4 software stack of routing hardware, it has no effect whatsoever on IPv6 traffic. A packet addressed to your server’s IPv6 GUA routes natively across the internet backbone, directly to your machine.
[Legacy IPv4 Client] ──► [Dual-Stack Cloud Edge] ──► (Pure IPv6 Tunnel) ──► [Home Server GUA]
| Metric | Traditional IPv4 over CGNAT | Pure IPv6 Native Path |
|---|---|---|
| Address Translation Layers | 2 (NAT444) | 0 (End-to-End Routable) |
| Inbound Connection Initiation | Blocked by default at ISP edge | Allowed (governed by local firewall) |
| Bandwidth Profile | Limited by proxy relay / VPS caps | Full line-rate of local ISP link |
| Protocol Support | Mostly HTTP; restrictive for raw TCP/UDP | Universal (TCP, UDP, ICMPv6, SCTP) |
| Monthly Operational Cost | Premium fees for static IP or relay | $0.00 (native stack feature) |
3. Resolving the Compatibility Gap: NAT64 and Cloud Ingress
A pure IPv6-only server solves the inward journey from the public internet to your local machine. It introduces one well-defined compatibility problem: a significant portion of the internet — legacy corporate networks, many public Wi-Fi access points, and some mobile carriers — still operates on IPv4-only configurations. An IPv4-only client cannot resolve DNS AAAA records or route packets across the IPv6 backbone.
The solution is not to abandon IPv6 but to position a thin, dual-stack translation layer at the edge.
The Hybrid Cloud Ingress Pattern
A lightweight, dual-stack reverse proxy or CDN edge node acts as an architectural translator:
- Public Face — Listens on both a public IPv4 address (
Arecord) and an IPv6 address (AAAArecord). - Translation Layer — Terminates incoming connection requests from legacy IPv4 clients.
- Backend Tunnel — Proxies clean requests over a pure IPv6 pathway directly to your home server’s GUA.
This completely eliminates any need to run data-heavy tunneling software locally. The connection utilises native OS networking stacks, and IPv4-to-IPv6 translation is handled transparently at the edge — without you paying for it.
                  ┌──────────────────┐
                  │ Cloudflare Edge  │
[IPv4 Client] ───►│ (Listens on IPv4)│
                  │        │         │
                  │  Translates to   │
                  │  IPv6 Backend    │
                  └────────┼─────────┘
                           │ (Direct Route over AAAA)
                           ▼
                  [Your Home Server GUA]
When an IPv4-only device resolves dev.yourdomain.com, Cloudflare’s edge responds with its own public IPv4 address. The IPv4 packet arrives at Cloudflare, which terminates the connection and opens a clean IPv6 pathway to your home network’s IPv6 destination — no cost, no relay subscription, no VPS.
4. Implementation Guide: Step-by-Step IPv6 Reverse Proxy Setup
Step 1: Verify Native IPv6 and Address Allocation
Before touching any software, confirm that your local network correctly receives a public IPv6 prefix from your ISP.
ip -6 addr show scope global
Look for an address starting with 2001: or a similar global scope prefix, not fe80: (which is link-local only):
inet6 2001:db8:1234:5678:a00:27ff:fe3a:57bc/64 scope global dynamic mngtmpaddr
   valid_lft 86400sec preferred_lft 14400sec
If no global address appears, log into your edge router and verify:
- IPv6 is enabled on the WAN interface.
- Prefix Delegation (DHCPv6-PD) is requested — a
/56or/64allocation is typical. - SLAAC (Stateless Address Autoconfiguration) or DHCPv6 is active on the internal LAN interface.
Step 2: Harden the Perimeter Firewall
This step is non-negotiable. IPv6 assigns a publicly routable address directly to your server, removing the incidental protection that NAT provided. Without explicit firewall rules, your machine is reachable from anywhere on the internet.
Log into your router’s firewall settings and create a targeted IPv6 Allow rule. Do not disable the IPv6 firewall globally. Explicitly permit inbound traffic only to your server’s specific IPv6 address and necessary ports.
On your local server, configure nftables (/etc/nftables.conf):
table inet filter {
    chain input {
        type filter hook input priority 0; policy drop;

        # Allow loopback
        iif "lo" accept

        # Allow established and related connections
        ct state established,related accept

        # Allow ICMPv6 — mandatory for Path MTU Discovery
        ip6 nexthdr icmpv6 icmpv6 type {
            destination-unreachable,
            packet-too-big,
            time-exceeded,
            parameter-problem,
            echo-request,
            echo-reply
        } accept

        # Allow inbound HTTPS to your server's specific GUA only
        tcp dport 443 ip6 daddr 2001:db8:1234:5678:a00:27ff:fe3a:57bc accept
    }
}
Critical: ICMPv6 must not be blocked. Unlike IPv4, IPv6 routers never fragment packets mid-transit. Instead, they rely on ICMPv6 “Packet Too Big” messages to signal senders to reduce their packet size (Path MTU Discovery). Blocking ICMPv6 causes random, hard-to-diagnose connection stalls whenever large payloads traverse a WAN link.
Step 3: Configure the Local IPv6 Reverse Proxy
Install and configure Nginx to bind explicitly to IPv6. Create /etc/nginx/sites-available/local-ingress.conf:
server {
    listen [::]:80;
    listen [::]:443 ssl http2;

    server_name dev.yourdomain.com;

    ssl_certificate /etc/letsencrypt/live/yourdomain.com/fullchain.pem;
    ssl_certificate_key /etc/letsencrypt/live/yourdomain.com/privkey.pem;

    ssl_protocols TLSv1.2 TLSv1.3;
    ssl_ciphers ECDHE-ECDSA-AES128-GCM-SHA256:ECDHE-RSA-AES128-GCM-SHA256:ECDHE-ECDSA-AES256-GCM-SHA384:ECDHE-RSA-AES256-GCM-SHA384;
    ssl_prefer_server_ciphers on;

    location / {
        # Proxy to your locally running application
        proxy_pass http://[::1]:8080;

        proxy_set_header Host $host;
        proxy_set_header X-Real-IP $remote_addr;
        proxy_set_header X-Forwarded-For $proxy_add_x_forwarded_for;
        proxy_set_header X-Forwarded-Proto $scheme;

        # Buffer tuning for API stream workloads
        proxy_buffers 8 16k;
        proxy_buffer_size 32k;
    }
}
Validate and apply:
sudo nginx -t
sudo systemctl restart nginx
Step 4: Establish the Dual-Stack Cloud Bridge via Cloudflare
- Navigate to your Cloudflare DNS Management panel.
- Create a new record for your subdomain (e.g.,
dev.yourdomain.com). - Set the record type to
AAAA. - Enter your home server’s Global Unicast IPv6 Address.
- Toggle Proxy Status to Proxied (the orange cloud).
That’s it. Cloudflare’s edge network now acts as your global IPv4/IPv6 translation layer, advertising its own IPv4 addresses to the world and routing clean IPv6 traffic directly to your home server — at no cost.
5. Handling Dynamic Prefixes: Automated IPv6 DDNS
Residential ISPs frequently rotate IPv6 prefix delegations — after router reboots, on a weekly cycle, or simply whenever the ISP decides. If your cloud bridge’s AAAA record points to a stale prefix, your setup breaks silently.
The fix is an automated DDNS synchronisation daemon that detects prefix changes and updates your DNS record via API.
The Sync Script
Create /usr/local/bin/ipv6-ddns-sync.sh:
#!/usr/bin/env bash
set -euo pipefail

# Configuration
ZONE_ID="YOUR_CLOUDFLARE_ZONE_ID"
RECORD_ID="YOUR_DNS_RECORD_ID"
RECORD_NAME="dev.yourdomain.com"
AUTH_TOKEN="YOUR_CLOUDFLARE_API_TOKEN"

# Extract the primary stable global IPv6 GUA (exclude deprecated/privacy addresses)
CURRENT_IPV6=$(ip -6 addr show scope global | grep -v "deprecated" | grep -oE '2001:[a-f0-9:]+' | head -n 1 || true)

if [ -z "$CURRENT_IPV6" ]; then
    echo "Error: No global IPv6 address detected on host interfaces." >&2
    exit 1
fi

echo "Detected active GUA: $CURRENT_IPV6"

RESPONSE=$(curl -s -X PUT "https://api.cloudflare.com/client/v4/zones/$ZONE_ID/dns_records/$RECORD_ID" \
     -H "Authorization: Bearer $AUTH_TOKEN" \
     -H "Content-Type: application/json" \
     --data "{\"type\":\"AAAA\",\"name\":\"$RECORD_NAME\",\"content\":\"$CURRENT_IPV6\",\"ttl\":120,\"proxied\":true}")

if [[ "$RESPONSE" == *'"success":true'* ]]; then
    echo "DNS AAAA record updated to: $CURRENT_IPV6"
else
    echo "Error: DNS update failed. Response: $RESPONSE" >&2
    exit 2
fi
sudo chmod +x /usr/local/bin/ipv6-ddns-sync.sh
Automating with Systemd Timers
Using a systemd timer is preferable to legacy cron — it handles missed executions, integrates with the journal for clean logging, and respects network availability ordering.
Create /etc/systemd/system/ipv6-ddns.service:
[Unit]
Description=Synchronise Ingress IPv6 GUA with Cloud Proxy DNS Record
After=network-online.target
Wants=network-online.target

[Service]
Type=oneshot
ExecStart=/usr/local/bin/ipv6-ddns-sync.sh
User=root
Create /etc/systemd/system/ipv6-ddns.timer:
[Unit]
Description=Run IPv6 DDNS Synchroniser Every 5 Minutes

[Timer]
OnBootSec=2min
OnUnitActiveSec=5min
Persistent=true

[Install]
WantedBy=timers.target
Enable and start:
sudo systemctl daemon-reload
sudo systemctl enable --now ipv6-ddns.timer
Verify it’s running:
systemctl list-timers --all | grep ipv6-ddns
6. Advanced Troubleshooting and Optimisation
Resolving MTU Blackhole Issues
Standard IPv4 segments have a maximum packet size (MTU) of 1500 bytes. IPv6 headers are larger, and WAN tunnels add encapsulation overhead — meaning packets frequently exceed a link’s MTU. Since IPv6 routers never fragment packets mid-transit, oversized packets are simply dropped, and the router sends an ICMPv6 “Packet Too Big” message back to the sender. If your firewall blocks ICMPv6, the sender never receives that signal and the connection stalls indefinitely — a condition known as an MTU blackhole.
Symptoms include connections that establish successfully but freeze when transferring large payloads: file uploads, large API responses, database dumps.
The most robust fix is to force TCP’s Maximum Segment Size (MSS) clamping at the firewall level:
# Clamp MSS to PMTU for all incoming IPv6 TCP connections
sudo ip6tables -A FORWARD -p tcp --tcp-flags SYN,RST SYN -j TCPMSS --clamp-mss-to-pmtu
Make this persistent across reboots via your ip6tables save mechanism or an @reboot cron entry.
Disabling Privacy Extensions on Ingress Servers
Modern Linux distributions enable IPv6 Privacy Extensions (RFC 4941) by default. This feature generates a randomised temporary IPv6 address every few hours for outbound connections — excellent for browser privacy, actively harmful for an ingress server.
If your DDNS script picks up a temporary privacy address rather than your stable hardware-derived (EUI-64) address, your DNS record will break the moment that temporary address expires.
Disable privacy extensions in /etc/sysctl.d/10-ipv6-privacy.conf:
net.ipv6.conf.all.use_tempaddr = 0
net.ipv6.conf.default.use_tempaddr = 0
net.ipv6.conf.eth0.use_tempaddr = 0
Apply immediately:
sudo sysctl --system
7. Summary Checklist
- [ ] Verify router config — Confirm IPv6 Prefix Delegation (DHCPv6-PD) is active on your edge router.
- [ ] Check server address — Run
ip -6 addrand confirm a valid Global Unicast Address (2001:...) is assigned. - [ ] Harden your firewall — Configure
nftablesor your router’s rules to allow inbound traffic only on necessary ports to your specific GUA. - [ ] Allow ICMPv6 — Ensure ICMPv6 passes through your firewall; blocking it breaks Path MTU Discovery and causes silent connection failures.
- [ ] Configure proxy bindings — Update Nginx or HAProxy to listen explicitly on IPv6 (
listen [::]:443). - [ ] Set up the cloud bridge — Point your domain’s
AAAArecord through Cloudflare (Proxied) to support legacy IPv4 clients at zero cost. - [ ] Disable privacy extensions — Prevent your server from binding to ephemeral temporary addresses (
use_tempaddr = 0). - [ ] Automate DDNS updates — Deploy the sync script and
systemdtimer to handle ISP prefix rotation automatically.
Conclusion: The Economics Are Now Compelling
Bypassing Carrier-Grade NAT no longer requires complex multi-hop overlays or expensive third-party relay subscriptions. The IPv4 shortage has made the status quo — paying cloud providers for public IPs, renting VPS relay nodes, or subscribing to SaaS tunnelling services — progressively more costly. AWS’s 2024 IPv4 charge alone is adding tens of millions of dollars per year to collective cloud bills across the industry.
IPv6 bypasses this entirely. Your server gets a globally routable address at no additional cost, traffic flows at full line-rate directly from the internet backbone to your machine, and a single Cloudflare AAAA record handles IPv4 compatibility for the portion of the internet that hasn’t yet migrated.
Global IPv6 adoption has crossed 45% and is accelerating. Major cloud providers — AWS, Google, Azure — are increasingly treating IPv6-native networking as the baseline rather than the exception. Transitioning your home lab or development infrastructure to a pure IPv6 ingress today does more than solve an immediate problem: it aligns your setup with the direction the entire internet is moving.
The tools are already on your server. The infrastructure is already free. The only thing left is the configuration.
Related InstaTunnel pages
Continue from this article into the most relevant product guides and workflows.
Related Topics
Keep building with InstaTunnel
Read the docs for implementation details or compare plans before you ship.