Secure Remote Access for Your Local Apple Silicon LLM: A Complete Guide
Quick answer
Secure Remote Access for Local Apple Silicon LLMs:Setup Guid: quick comparison answer
Choose the tunnel tool based on the network model: public HTTPS URLs for webhooks and demos, private mesh access for internal apps, and managed infrastructure when policy controls matter most.
Which tunnel tool is best for public webhook testing?
Use a public HTTPS localhost tunnel with stable URLs. InstaTunnel focuses on webhook testing, demos, OAuth callbacks, and MCP endpoint workflows.
When should I choose a private network tool instead?
Choose a private mesh or Zero Trust tool when every user and service should stay inside a controlled private network.
The renaissance of local AI inference has fundamentally changed how developers build and interact with Large Language Models (LLMs). Thanks to the unified memory architecture of Apple Silicon (M1 through M5) and optimized frameworks like MLX, running massive 70B+ parameter models locally is no longer a pipe dream reserved for server farms. Tools like Ollama, LM Studio, and MLX-native servers such as oMLX have democratized AI, turning the Mac Studio or MacBook Pro sitting on your desk into a genuine AI server.
But what happens when you leave your desk?
With the rise of powerful local AI inference, developers naturally want to access their home lab’s AI models while traveling, working from a coffee shop, or collaborating with a remote team. You want the brainpower of your Mac Studio, but you only have a lightweight MacBook Air in your backpack.
The immediate temptation is to open up your router settings and port-forward your local inference server to the public internet. Do not do this. Exposing your local AI infrastructure to the wild internet is a massive security risk.
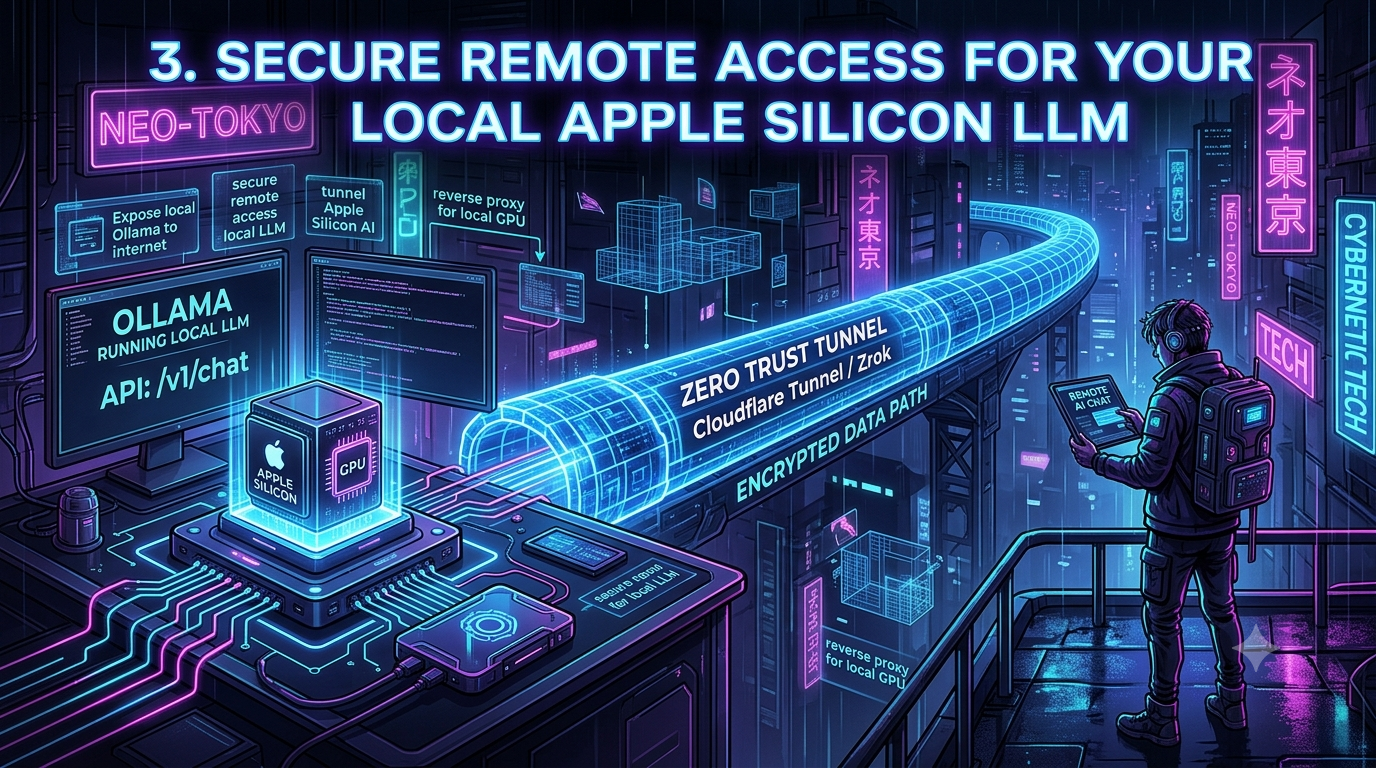
In this guide, we will explore how to securely expose local Ollama to internet access using Zero Trust networking tools. Whether you are looking to create a reverse proxy for local GPU workloads or securely tunnel Apple Silicon AI for your remote team, we will cover the safest, most robust methods available today, including Tailscale, Cloudflare Tunnels, and Zrok.
1. The Apple Silicon Advantage for Local AI
Before diving into the networking aspect, it’s worth understanding why Apple Silicon has become the darling of the local AI movement — and why the hardware picture has shifted even in the last few weeks.
Traditional PC architectures separate CPU memory (RAM) from GPU memory (VRAM). If you want to run a quantized 70B model on a PC, you need enough VRAM to hold the weights. NVIDIA’s current flagship consumer card, the RTX 5090, ships with 32GB of GDDR7 (up from the RTX 4090’s 24GB of GDDR6X), which helps but still isn’t enough to hold a 70B model at anything but aggressive quantization without splitting layers across multiple cards.
Apple Silicon uses a Unified Memory Architecture (UMA): the CPU and GPU share one pool of high-bandwidth memory, so a single Mac can allocate far more memory to the GPU than any consumer graphics card offers. Apple just pushed this further: on August 25, 2026 it refreshed the Mac Studio with M5 Max and M5 Ultra chips, replacing the M4 Max/M3 Ultra pairing that shipped since March 2025. The M5 Ultra configuration supports up to 512GB of unified memory at 1.2TB/s of bandwidth — 50% higher bandwidth than the previous generation — and Apple claims up to 4.3x the peak AI compute of the M3 Ultra. (Shipping started September 22, 2026; the 512GB configuration specifically is delayed to late October due to memory supply constraints.) Thunderbolt 5’s 120GB/s-per-port bandwidth also enables clustering multiple Mac Studios together, which Apple says delivers up to 3x faster distributed inference than a single machine — worth keeping in mind if you outgrow one box, since only the cluster’s head node needs the remote-access tunneling covered in this guide.
The software stack has moved just as fast. MLX is Apple’s own open-source array-computation framework, built specifically to exploit unified memory (zero-copy tensors, no PCIe transfer bottleneck). For most of its life, Ollama ran on Macs via llama.cpp’s Metal backend — a portable engine, but not one written for Apple’s memory model. That changed on March 31, 2026, when Ollama 0.19 shipped an MLX inference backend for Apple Silicon (currently a preview feature). On Macs with 32GB or more of unified memory, enabling it via OLLAMA_USE_MLX=1 roughly doubles decode throughput in independent benchmarks; 8GB and 16GB Macs still run the old Metal path unchanged, since MLX support requires that memory floor.
If you want to go further than Ollama’s built-in MLX support, dedicated MLX-native servers have emerged specifically for this hardware. oMLX, for example, is an inference server built on top of Apple’s mlx-lm, aimed at the workloads that expose Ollama’s weak spot: coding agents that resend a slightly-shifted prompt prefix on every turn. It adds continuous batching, a two-tier (RAM-hot, SSD-cold) KV cache that survives restarts, multi-model serving, and an OpenAI- and Anthropic-compatible API — everything in this guide’s tunneling advice applies to it exactly as it does to Ollama, since it’s just another local HTTP server.
Combine any of these with an enterprise-grade AI server sitting quietly on your desk, and an enterprise server needs enterprise-grade security — especially once you want to reach it remotely.
2. The Danger of Port Forwarding: Why You Need a Reverse Proxy
By default, when you start Ollama on your Mac, it binds to 127.0.0.1:11434 (localhost). It’s completely inaccessible to any other device on your network, let alone the internet.
To gain remote access, the outdated, traditional method is:
1. Bind Ollama to 0.0.0.0 (all network interfaces).
2. Go into your home router’s admin panel.
3. Forward TCP port 11434 to your Mac’s internal IP address.
4. Access your AI via your home’s public IP address.
Why is this a terrible idea? - Unauthenticated Access: Ollama has no built-in authentication layer. If you expose the port, anyone who scans the internet and finds your IP can use your GPU to generate text — or worse, pull and run their own models on your hardware. - DDoS Attacks: Your home IP becomes a target for Distributed Denial of Service attacks. - Zero Encryption: Port forwarding raw HTTP traffic means your prompts and the model’s responses cross the internet in plain text. - Network Penetration: If a vulnerability is ever discovered in the software you’re exposing, it becomes a pivot point into your entire home network.
To achieve secure remote access local LLM environments, abandon port forwarding and adopt Zero Trust Tunnels. A Zero Trust tunnel establishes an outbound connection from your Mac to a secure edge network — no inbound ports are opened on your firewall. You get the benefits of a reverse proxy for local GPU without the security holes.
3. Prerequisite: Preparing Ollama for Network Access
Regardless of which tunneling method you choose, you first need to tell Ollama to accept connections from outside localhost.
On macOS, Ollama runs as a background application. To change its host binding, set environment variables before the app launches:
- Open Terminal.
- Use
launchctlto setOLLAMA_HOSTfor your user session:bash launchctl setenv OLLAMA_HOST "0.0.0.0:11434"3. If you’ll be hitting the API from a remote web UI, also allow the origins it will send requests from (Ollama only allows127.0.0.1/0.0.0.0by default):bash launchctl setenv OLLAMA_ORIGINS "*" - Quit Ollama completely from the menu bar and relaunch it from Applications.
One catch the community runs into constantly: launchctl setenv only applies to your current login session — it does not survive a reboot. For a setting that sticks, add the same commands to a login script or a LaunchAgent plist that runs at login, rather than assuming a one-time Terminal command is permanent. This matters more than it sounds, because section 8 below is all about keeping your Mac running unattended for days at a time.
Your local LLM is now ready to be tunneled safely.
4. Method 1: Tailscale (The Most Secure, Developer-Only Route)
If you’re a solo developer who only needs to access your home AI from your own devices while traveling, Tailscale is arguably the best solution.
Tailscale is a zero-config VPN built on WireGuard. It creates a private, encrypted mesh network (a “Tailnet”) between your devices, and because it doesn’t expose your server to the public web, it’s inherently the safest way to tunnel Apple Silicon AI.
A pricing note worth getting right: Tailscale’s free Personal plan is not capped at a device count the way it used to be marketed. It’s free for up to six users in one tailnet, with unlimited devices you register yourself under your own login (up to 50 tagged/shared resources). For a solo developer connecting a Mac Studio, a travel laptop, and a phone, that’s one user with effectively no practical device limit.
Step-by-Step Setup:
- Create an Account: Go to Tailscale.com and sign in (Google, GitHub, or Microsoft).
- Install on the Host: Install Tailscale on your Apple Silicon Mac (the host) and log in.
- Install on the Client: Install Tailscale on your remote device (travel MacBook Air, iPad, phone).
- Find your Tailscale IP: Once both devices join your Tailnet, check the Tailscale menu bar icon on your host Mac for its address (usually starting with
100.x.x.x). Say it’s100.10.20.30.
Accessing your AI:
From your remote device, query your home Mac exactly as if you were sitting in front of it:
curl http://100.10.20.30:11434/api/generate -d '{
  "model": "llama3",
  "prompt": "Explain quantum computing in one sentence."
}'
Pros of Tailscale: - Zero public internet exposure. - End-to-end WireGuard encryption. - Incredibly low latency. - Free for personal use with no meaningful device ceiling.
Cons — and the fix: the classic knock on Tailscale is that it doesn’t help if you want to share your AI with someone who isn’t on your Tailnet, since they’d need to install a VPN client too. Tailscale’s answer to that is Funnel: it lets you publish a service running on your tailnet to the broader public internet over HTTPS, with no client software required on the visitor’s end (you’d run something like tailscale funnel 11434 after enabling Funnel on your tailnet). It’s available on every plan, though Tailscale’s own docs still label it beta, so treat it as a good fit for sharing with a teammate for an afternoon rather than a permanent production front door — for that, Cloudflare Tunnels below is the more mature option.
5. Method 2: Cloudflare Tunnels (Best for Web UIs & Team Sharing)
If you want to access your local AI via a standard web address (e.g., https://ai.yourdomain.com) without requiring VPN software on the client side, Cloudflare Tunnels is the industry standard.
Cloudflare Tunnels (via the cloudflared daemon) creates a secure outbound connection from your Mac to Cloudflare’s edge. Layer Cloudflare Access (Zero Trust) on top, and you can force users to authenticate — via Google, GitHub, or an email PIN — before they ever reach your local machine.
Step-by-Step Setup:
1. Domain & Cloudflare Account:
You need a domain on Cloudflare’s nameservers. A cheap .dev or .io domain works fine.
2. Create the Tunnel (dashboard-managed, the current default flow):
1. Log into the Cloudflare Zero Trust dashboard.
2. Navigate to Networking → Tunnels — this is a naming change worth flagging: Cloudflare moved tunnel management out from under the old Access → Tunnels path into its own Networking section as part of a dashboard update in March 2026.
3. Click Create a tunnel, choose Cloudflared as the connector type, and name it (e.g., Mac-Studio-AI).
4. Cloudflare shows you an install command containing a long token starting with eyJ.... On macOS, install the daemon via Homebrew first:
brew install cloudflared
Then run the install command it gave you, which registers the tunnel using that token — no separate cloudflared tunnel login step is required for this dashboard-managed flow. (The classic cloudflared tunnel login + local config.yml approach — a “locally-managed” tunnel — still works and is preferable if you want your routing rules in version control, but the token-based dashboard flow is what Cloudflare surfaces first today, and it’s simpler for a single Mac.)
3. Route the Traffic:
Back in the dashboard, add a Public Hostname (shown as “Published application routes” in some newer dashboard views):
- Subdomain: ai
- Domain: yourdomain.com
- Service Type: HTTP
- URL: localhost:11434 (raw Ollama API) or localhost:8080 (Open WebUI in Docker)
4. Secure it with Cloudflare Access (crucial step):
If you stop here, anyone on the internet can hit https://ai.yourdomain.com and use your GPU. Add authentication:
1. In the Zero Trust dashboard, go to Access controls → Applications (this replaced the older Access → Applications path).
2. Click Add an Application → Self-Hosted.
3. Set the domain to ai.yourdomain.com.
4. Create a policy (e.g., “Allow My Email”) with rule Include → Emails → your_email@gmail.com.
Now https://ai.yourdomain.com prompts a login before letting anyone through, giving you secure, HTTPS-encrypted access to your home AI.
A caveat that matters specifically for LLM traffic: if you just want to test things quickly without a domain, Cloudflare’s cloudflared tunnel --url http://localhost:8080 “quick tunnel” spins up a random trycloudflare.com URL in seconds with zero account setup. It’s genuinely useful for a five-minute demo — but Cloudflare’s own docs are explicit that quick tunnels cap out at 200 concurrent requests and do not support Server-Sent Events (SSE). Since Ollama, Open WebUI, and LiteLLM all stream tokens back to the client over SSE, a quick tunnel will silently break streaming responses (you’ll either get nothing until the full response completes, or a broken connection, depending on the client). For anything beyond a quick sanity check, create a real named tunnel through the steps above.
6. Method 3: Zrok & Ngrok (Best for Ephemeral/Quick Sharing)
Sometimes you don’t need a permanent VPN or a dedicated domain. Maybe you’re at a hackathon and want a teammate to hit your local LLM API for an hour, or you just want to test a webhook quickly.
Ngrok is the tool most developers reach for by default, and it deserves a fairer characterization than “the free tier is too restrictive.” Since 2023, every free ngrok account gets one permanent static “dev domain” (something like panda-new-kit.ngrok-free.app) that doesn’t change on restart — the days of a brand-new random URL every time you relaunch ngrok are over. What does still require a paid plan is a genuinely custom/branded domain (api.yourdomain.com), along with more than the free tier’s 3 concurrent endpoints, 1GB/month of bandwidth, and 20K HTTP requests/month.
A modern, open-source alternative is Zrok, built on the OpenZiti zero-trust network.
Setting up Zrok:
- Download the Zrok binary for macOS (Apple Silicon/ARM64).
- Request an invite by email — no invite token is required anymore, just an address:
bash
zrok invite
Follow the emailed link to the zrok web console and use “Enable Your Environment” to generate an environment token. 3. Enable your local environment with that token:bash zrok enable <YOUR_TOKEN> - To securely expose local Ollama to internet access with a temporary HTTPS URL:
bash
zrok share public localhost:11434
Zrok instantly provides an HTTPS URL you can drop into your remote application code. When you stop thezrokprocess, the tunnel closes for good. Worth knowing before you share an LLM endpoint this way: a plainzrok share publicallocates what zrok calls an “open permission” share — anyone who has the URL can use it, with no additional account check on zrok’s side. If you want to restrict access to specific zrok accounts you trust, add the--closedflag (and--access-grant user@example.comto name who’s allowed) rather than relying on the URL itself staying secret. — ## Quick Comparison | | Best for | Client needs a tool? | Public URL? | |—|—|—|—| | Tailscale | Personal, multi-device access | Yes (Tailscale app) — unless using Funnel | No (Funnel: yes, beta) | | Cloudflare Tunnel | Team access, permanent domain, SSO-gated | No | Yes | | Zrok | Ephemeral, self-hostable, hackathon-style sharing | No | Yes (open by default — use--closedto restrict) | | Ngrok | Fast one-off testing, familiar tooling | No | Yes (static free dev domain; custom domains are paid) | — ## 7. Elevating the Experience: Adding LiteLLM and Open WebUI Exposing the raw Ollama API is great for code, but it lacks the creature comforts of ChatGPT or Claude. Two tools make a remote setup feel like a real product. ### Open WebUI Open WebUI is a self-hosted, ChatGPT-style frontend with built-in authentication, user management, and chat history — and it’s become one of the most popular self-hosted AI projects, passing 147,000 GitHub stars and 338 million downloads by mid-2026. It runs cleanly in Docker on Apple Silicon:bash docker run -d -p 3000:8080 \ --add-host=host.docker.internal:host-gateway \ -v open-webui:/app/backend/data \ --name open-webui --restart always \ ghcr.io/open-webui/open-webui:main
An Apple Silicon-specific gotcha worth flagging explicitly: Docker Desktop on macOS still does not pass Metal GPU access through to containers as of this writing. If you run Ollama itself inside Docker on your Mac, it silently falls back to CPU-only inference — often dramatically slower than you’d expect from an M-series chip. Keep Ollama running natively on macOS (as this whole guide assumes) and only containerize Open WebUI, pointing it at your native Ollama instance with OLLAMA_BASE_URL=http://host.docker.internal:11434. Then tunnel port 8080 through Cloudflare or Tailscale instead of 11434 — Open WebUI’s own auth and chat history make it the better remote workstation interface anyway.
LiteLLM
If you’re building apps remotely and need a single OpenAI-compatible endpoint in front of more than 100 possible providers (Ollama, OpenAI, Anthropic, Azure, Bedrock, and others), put LiteLLM in front of Ollama. A minimal config.yaml:
model_list:
  - model_name: llama3
    litellm_params:
      model: ollama/llama3.2:3b
      api_base: http://localhost:11434
Run it with litellm --config config.yaml (default port 4000). More importantly for remote access, LiteLLM’s proxy mode issues virtual API keys with per-key budgets and rate limits — configure your Cloudflare Tunnel to expose LiteLLM’s port, bypass the Cloudflare Access login screen for API routes specifically, and instead require a valid LiteLLM key in the request header. That gives you a genuinely enterprise-grade inference gateway running entirely on your local Mac.
8. Optimizing Your Apple Silicon Host for Always-On Operation
If you’re traveling for a week, the last thing you want is your Mac sleeping and severing your AI tunnel. Apple Silicon Macs are power-efficient, but macOS still aggressively sleeps idle machines.
- System Settings: The exact path depends on which Mac you’re using. On a desktop Mac Studio — which has no battery — go to System Settings, then Energy Saver (labeled simply “Energy” on some configurations) in the sidebar, and turn on “Prevent automatic sleeping when the display is off.” On a MacBook, the equivalent toggle lives under Battery → Options, and only applies while connected to power — on battery, macOS reserves the right to sleep an idle laptop regardless. (Older guides pointing to Displays → Advanced describe a path from earlier macOS versions; current System Settings groups this under Energy Saver/Battery instead.)
- Amphetamine or caffeinate:
Install the free Mac App Store app Amphetamine and set an indefinite “Keep Awake” session, or use the built-in
caffeinatecommand.caffeinate -iprevents idle sleep for as long as the terminal window stays open; add-dto also keep the display awake, or run it against a specific process so it releases automatically when that process exits:caffeinate -i -w $(pgrep -f ollama). - Auto-Start Services:
Set Ollama, Docker (for Open WebUI), and
cloudflaredto launch at startup, so a power blip and reboot doesn’t take your AI tunnel down with it. macOSlaunchd(LaunchAgents/LaunchDaemons) is the right tool for this — and remember from section 3 that anylaunchctl setenvvariables need to be re-applied at login too, since they don’t persist through a restart on their own.
Conclusion
Apple Silicon’s hardware keeps shifting the AI paradigm further onto the desk in front of you — the Mac Studio refresh alone jumped from a 192GB-class machine to one that officially supports 512GB of unified memory at 1.2TB/s, and Ollama’s own new MLX backend is pulling real speed out of that architecture rather than treating it like just another GPU. But with that power comes the responsibility of managing your own network infrastructure.
By avoiding port forwarding and embracing Zero Trust solutions, you get safe, fast, and reliable remote access. Whether you choose the private mesh of Tailscale, the Zero Trust web access of Cloudflare Tunnels, or the ephemeral sharing of Zrok, you can securely tunnel Apple Silicon AI and use the full power of your local hardware from anywhere in the world.
Your LLM might be local, but your access doesn’t have to be. Set up your reverse proxy today, secure it tightly, and enjoy private AI inference wherever your travels take you.
Changelog
Fact-checked against current documentation and vendor announcements (web-verified September 14, 2026):
- Ollama’s MLX backend — the draft treated Ollama and MLX as parallel, separate tools. As of Ollama 0.19 (March 31, 2026, preview), Ollama itself runs an MLX inference backend on Apple Silicon Macs with 32GB+ unified memory (enabled via
OLLAMA_USE_MLX=1), replacing the llama.cpp/Metal path it used previously and roughly doubling decode throughput in independent benchmarks; 8–16GB Macs are unaffected. Added this as a new paragraph in Section 1. - oMLX description was vague/inaccurate — corrected from generic “wrapper” framing to its actual scope: a coding-agent-focused inference server built on
mlx-lm, adding continuous batching, a two-tier RAM/SSD KV cache, multi-model serving, and OpenAI- and Anthropic-compatible APIs. - Mac Studio memory figures were outdated — draft said “128GB or 192GB.” Apple refreshed the Mac Studio on August 25, 2026 with M5 Max/M5 Ultra chips supporting up to 512GB of unified memory at 1.2TB/s (50% more bandwidth than prior generation); the 512GB configuration specifically won’t ship until late October 2026 due to memory supply constraints. Added Thunderbolt 5 multi-Mac clustering (~3x distributed-inference speedup per Apple) as new content, tied back to the tunneling topic (only the cluster head node needs remote exposure).
- RTX 4090 comparison was stale — added that NVIDIA’s current flagship, the RTX 5090, now ships 32GB of GDDR7 (vs. the 4090’s 24GB GDDR6X), while keeping the core point that this still trails Apple’s unified-memory ceiling by an order of magnitude for 70B+ models.
- Tailscale free-tier claim was wrong — draft said “free for up to 100 devices.” Tailscale’s current Personal plan model is per-user (6 free users), not a device cap; the 20⁄100-device-cap framing describes a discontinued pricing model. Corrected the pros/cons and added the actual current limits (unlimited devices per user you register, 50 tagged resources).
- Added Tailscale Funnel as new content directly answering the draft’s listed “con” (can’t share with non-Tailscale users) — noted it’s available on all plans but still labeled beta in Tailscale’s own docs.
- Cloudflare dashboard navigation was outdated — draft said “Access → Tunnels” and “Access → Applications.” Cloudflare moved tunnel management to a dedicated Networking → Tunnels section (dashboard update, March 2026) and the Access app path is now Access controls → Applications. Also corrected the setup flow to reflect the current default (token-based, dashboard-managed tunnel creation) while preserving the CLI
cloudflared tunnel loginflow as the alternative “locally-managed” path, and renamed “Public Hostname” to note it now appears as “Published application routes” in newer dashboard views. - Added a Server-Sent Events (SSE) warning for Cloudflare quick tunnels — new content, not in the draft:
cloudflared tunnel --urlephemeral tunnels are capped at 200 concurrent requests and explicitly do not support SSE per Cloudflare’s own docs, which will silently break token streaming from Ollama, Open WebUI, or LiteLLM. This is directly relevant to this audience and wasn’t mentioned at all in the original draft. - Zrok setup was mostly accurate but under-specified — clarified that
zrok inviteis now token-free at the invite stage (just an email address; the environment token comes later from the web console), and added the--closed/--access-grantflags since zrok’s defaultshare publicis an “open permission” share reachable by anyone with the URL — a meaningful security nuance for an article about securely exposing an LLM. - Ngrok framing was uncharitable/dated — draft implied the free tier requires payment for “static endpoints.” Ngrok has given every free account one static “dev domain” since 2023; only genuinely custom/branded domains and higher endpoint/bandwidth limits require a paid plan. Corrected the framing and added concrete free-tier numbers (3 endpoints, 1GB/month, 20K requests/month).
- Added a Docker-on-Apple-Silicon GPU passthrough warning — new content: Docker Desktop on macOS does not pass Metal GPU access into containers, so Dockerizing Ollama itself on a Mac silently falls back to CPU inference. This wasn’t mentioned in the draft at all despite the guide’s entire premise being Apple Silicon GPU performance, and directly affects the Open WebUI Docker instructions in Section 7.
- LiteLLM section extended with an accurate minimal
config.yamlexample and the correct default port (4000), and clarified it now fronts 100+ providers rather than just “OpenAI-compatible.” - Corrected the “Prevent automatic sleeping” navigation path — draft said System Settings → Displays → Advanced. Current System Settings (as documented across multiple 2026 sources) puts this under Energy Saver for desktop Macs (which have no Battery pane) and under Battery → Options for laptops; the Displays → Advanced path reflects older macOS versions. Added the laptop/desktop distinction and the caveat that the toggle only works on AC power for laptops.
caffeinateusage expanded with the-dflag and a process-scoped example (-w $(pgrep ...)) so the assertion releases automatically instead of requiring a manually-closed terminal window.- Added a “Quick Comparison” table summarizing the three tunneling methods, consistent with this blog’s usual format for multi-tool pieces.
- Removed no factual claims outright — every correction above replaces or extends a claim rather than deleting content wholesale — and no metadata/frontmatter was present in the original draft to strip.
Related InstaTunnel pages
Continue from this article into the most relevant product guides and workflows.
Related Topics
Keep building with InstaTunnel
Read the docs for implementation details or compare plans before you ship.