Secure Remote Access for Your Local Apple Silicon LLM: A Complete Guide
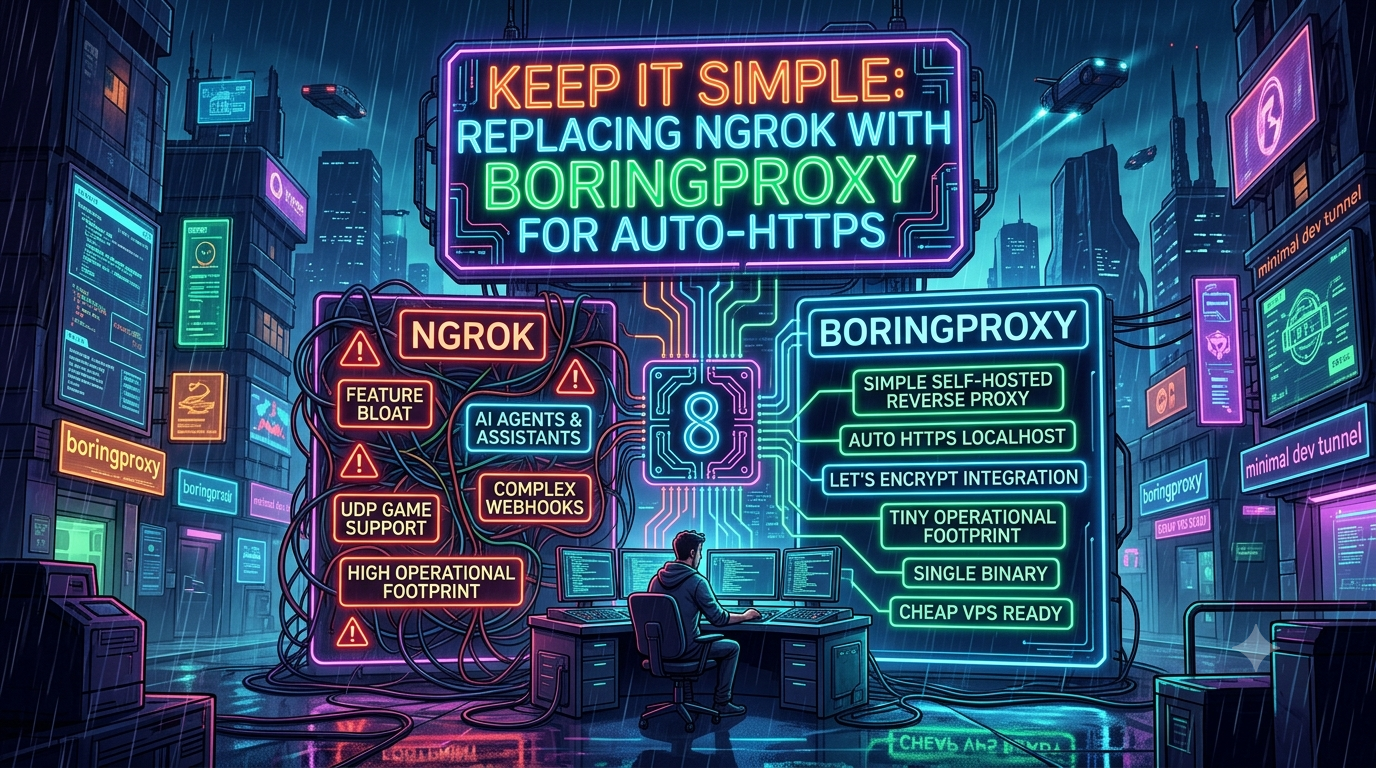
Quick answer
Replacing ngrok with boringproxy for Simple Auto-HTTPS: quick comparison answer
Choose the tunnel tool based on the network model: public HTTPS URLs for webhooks and demos, private mesh access for internal apps, and managed infrastructure when policy controls matter most.
Which tunnel tool is best for public webhook testing?
Use a public HTTPS localhost tunnel with stable URLs. InstaTunnel focuses on webhook testing, demos, OAuth callbacks, and MCP endpoint workflows.
When should I choose a private network tool instead?
Choose a private mesh or Zero Trust tool when every user and service should stay inside a controlled private network.
The renaissance of local AI inference has fundamentally changed how developers build and interact with Large Language Models (LLMs). Thanks to the unified memory architecture of Apple Silicon (M1 through M5) and optimized frameworks like MLX, running massive 70B+ parameter models locally is no longer a pipe dream reserved for server farms. Tools like Ollama, oMLX, and LM Studio have turned the Mac Studio or MacBook Pro on your desk into a serious AI server.
But what happens when you leave your desk?
With local AI inference now genuinely capable, developers naturally want to reach their home lab’s models while traveling, working from a coffee shop, or collaborating with a remote team. You want the brainpower of your M3 Max or M5 Ultra, but you’ve only got a MacBook Air in your backpack.
The immediate temptation is to open your router settings and port-forward your local inference server to the public internet. Do not do this. Exposing local AI infrastructure directly to the internet is a serious security risk.
This guide walks through the safest, most robust ways to reach a local Ollama server from anywhere, using Zero Trust networking tools instead of raw port forwarding: Tailscale, Cloudflare Tunnel, and Zrok/ngrok.
1. The Apple Silicon Advantage for Local AI
Traditional PC architectures separate CPU memory (RAM) from GPU memory (VRAM). To run a quantized Llama-class 70B model on a PC, you need enough VRAM to hold the weights. Even NVIDIA’s current flagship consumer card, the RTX 5090, tops out at 32GB of GDDR7 (a jump from the RTX 4090’s 24GB, but still a hard ceiling for a single card), which is why running very large models on PC hardware usually means stringing multiple GPUs together.
Apple Silicon uses a Unified Memory Architecture (UMA): the CPU and GPU share one pool of high-bandwidth memory, so the GPU can address whatever fraction of it a workload needs rather than being capped by a physically separate VRAM pool. This is most dramatic in the current Mac Studio lineup. Apple refreshed Mac Studio in August 2026 with M5 Max and M5 Ultra chips: the M5 Max model tops out at 128GB of unified memory at 614GB/s of bandwidth, while the M5 Ultra scales to a 36-core CPU, an 80-core GPU, and — the headline number — up to 512GB of unified memory at 1.2TB/s of bandwidth. Apple also added Thunderbolt 5 to the lineup, which the Mac community has already started using to cluster multiple Studios together for distributed inference, roughly tripling effective throughput on models too large for one machine. Note that 512GB configurations weren’t available at Mac Studio’s September 22, 2026 launch and were pushed to late October.
Frameworks built specifically for this hardware, chiefly Apple’s own MLX, are what actually unlock that memory advantage. Pairing MLX with Ollama — the popular framework for running LLMs locally — gives you an enterprise-grade AI server sitting quietly on your desk. And as of Ollama 0.19 (a preview released March 31, 2026), that pairing is now built in: Ollama ships a native MLX backend for Apple Silicon, enabled with OLLAMA_USE_MLX=1, and Ollama’s own benchmarks on an M5 Max show meaningful prefill and decode speedups over the previous Metal/llama.cpp path — Ollama credits NVIDIA’s contributed NVFP4 quantization work for part of the gain. The catch: the MLX backend currently requires 32GB or more of unified memory, so Macs with 8GB or 16GB stay on the existing Metal backend, which remains solid on its own. Coverage of other model architectures beyond the initial set is expected to expand as the feature leaves preview, so check Ollama’s release notes (or your server logs after enabling the flag) before assuming it’s active for a given model.
An enterprise-grade server, of course, needs enterprise-grade security — especially once you want to reach it remotely.
2. The Danger of Port Forwarding: Why You Need a Reverse Proxy
By default, when you start Ollama on your Mac, it binds to 127.0.0.1:11434 (localhost). It’s completely inaccessible to any other device on your network, let alone the internet.
The outdated, risky way to get remote access is:
1. Bind Ollama to 0.0.0.0 (all network interfaces).
2. Go into your home router’s admin panel.
3. Forward TCP port 11434 to your Mac’s internal IP address.
4. Access your AI via your home’s public IP address.
Why this is a bad idea: - Unauthenticated access. Ollama has no built-in authentication. If you expose the port, anyone who scans the internet and finds your IP can use your GPU to generate text — or worse, hijack it for spam generation. - DDoS exposure. Your home IP becomes a target once it’s known to be serving something. - Zero encryption. Plain port forwarding over HTTP means prompts and responses travel across the internet in cleartext. - A pivot point into your network. Any future vulnerability in the exposed software becomes a foothold into your entire home LAN.
The fix is to abandon port forwarding and use Zero Trust tunnels instead. A Zero Trust tunnel opens an outbound connection from your Mac to a secure edge network — no inbound ports on your firewall, ever. You get the routing benefit of a reverse proxy without the security hole of an open port.
3. Prerequisite: Preparing Ollama for Network Access
Regardless of which tunneling method you pick, Ollama first needs to accept connections from outside localhost.
On macOS, Ollama runs as a background service, so you set this via an environment variable before the app launches:
- Open Terminal.
- Use
launchctlto setOLLAMA_HOSTfor your user session:bash launchctl setenv OLLAMA_HOST "0.0.0.0"3. If a remote web UI will call the API directly from the browser, also set CORS origins:bash launchctl setenv OLLAMA_ORIGINS "*" - Quit Ollama completely from the menu bar and relaunch it from Applications.
If you also want the newer MLX backend for a meaningful speed bump on 32GB+ Macs, add:
launchctl setenv OLLAMA_USE_MLX "1"
then restart Ollama the same way. This is independent of the networking setup below — it’s purely a local inference-speed toggle.
Your local LLM is now ready to be tunneled safely.
4. Method 1: Tailscale (The Most Secure, Developer-Only Route)
If you’re a solo developer who just needs to reach your home AI from your own laptop or phone while traveling, Tailscale is arguably the best fit.
Tailscale is a zero-config mesh VPN built on WireGuard. It creates a private, encrypted network (a “tailnet”) between your own devices, so nothing is exposed to the public web by default — inherently the safest way to reach a Mac’s local services remotely.
Tailscale overhauled its pricing in April 2026: the free Personal plan now covers up to 6 users with unlimited self-registered devices per user (up from the old 3-user, 100-device cap). Paid tiers — Standard at roughly $8/user/month and Premium at roughly $18/user/month — add things like SSO, MDM integration, and Tailscale SSH session recording, but a solo developer or small household setup can realistically stay on the free tier indefinitely.
Step-by-Step Setup
- Create an account at tailscale.com (Google, GitHub, or Microsoft login).
- Install on the host — your Apple Silicon Mac — and log in.
- Install on the client — your travel laptop, phone, or tablet.
- Find your Tailscale IP. Once both devices are on your tailnet, the Tailscale menu bar icon on your host Mac shows an address starting with
100.x.x.x. Say it’s100.10.20.30.
Accessing Your AI
From your remote device, query your home Mac exactly as if you were sitting in front of it:
curl http://100.10.20.30:11434/api/generate -d '{
  "model": "llama3",
  "prompt": "Explain quantum computing in one sentence."
}'
Pros: - Zero public internet exposure by default. - End-to-end WireGuard encryption. - Very low latency. - Free tier now covers most personal use cases outright.
Cons: - Out of the box, only devices on your own tailnet can reach the server — you can’t hand a link to a non-Tailscale collaborator. - Requires a VPN client on every connecting device.
That second con has a real answer now: Tailscale Funnel, available on all plans (including free) and currently in beta, lets you expose one specific local service to the public internet over a Tailscale-managed HTTPS URL — without requiring the visitor to run Tailscale at all. It’s a narrower, more deliberate form of exposure than the other methods below, and worth reaching for when you need to hand one link to someone outside your tailnet without standing up a whole separate tunnel.
5. Method 2: Cloudflare Tunnel (Best for Web UIs & Team Sharing)
If you want to reach your local AI via a normal web address (https://ai.yourdomain.com) without installing VPN software on the client side, Cloudflare Tunnel is the standard choice.
Cloudflare Tunnel (via the cloudflared daemon) opens a secure outbound connection from your Mac to Cloudflare’s edge. Layer Cloudflare Access on top and you can force visitors to authenticate — via Google, GitHub, or an email PIN — before traffic ever reaches your local machine.
Step-by-Step Setup
1. Domain & Cloudflare account. You’ll need a domain managed by Cloudflare (a cheap .dev or .io domain with its nameservers pointed at Cloudflare works fine).
2. Create the tunnel. Cloudflare moved Tunnel management into the main Cloudflare dashboard in March 2026, under Networking → Tunnels (the older Zero Trust dashboard path, under Networks → Connectors, still works too — both manage the same tunnels). Creating a tunnel there gives you a token-based, dashboard-managed connector by default; the older cloudflared tunnel login CLI flow still exists as a “locally managed” alternative if you prefer to keep the credentials off Cloudflare’s servers. Cloudflare’s dashboard navigation shifts fairly often, so if these exact menu names have moved again by the time you read this, search “tunnels” in the dashboard’s search bar.
3. Install cloudflared on your Mac via Homebrew:
brew install cloudflared
Then authenticate:
cloudflared tunnel login
4. Route the traffic. In the tunnel’s public hostname configuration:
- Subdomain: ai
- Domain: yourdomain.com
- Service Type: HTTP
- URL: localhost:11434 (raw Ollama API) or localhost:8080 (Open WebUI in Docker)
5. Secure it with Cloudflare Access. Without this step, anyone who finds https://ai.yourdomain.com can use your GPU for free. Under Access controls → Applications, add a self-hosted application for ai.yourdomain.com and create a policy (e.g., “Allow my email”).
Once set up, navigating to https://ai.yourdomain.com triggers a Cloudflare login prompt before you reach your Mac at all.
A caveat the original setup guides tend to miss
If you skip the domain-and-dashboard setup entirely and just run a quick tunnel —
cloudflared tunnel --url http://localhost:11434
— Cloudflare hands you an instant *.trycloudflare.com URL with no account needed. It’s genuinely convenient, but it comes with two hard limits straight from Cloudflare’s own docs: quick tunnels cap out at 200 concurrent in-flight requests (returning HTTP 429 beyond that), and they do not support Server-Sent Events (SSE) at all. That second one matters a lot here — Ollama, Open WebUI, and LiteLLM all stream tokens back to the client, and depending on how a given client implements streaming, an SSE-based response can silently break or hang on a quick tunnel with no clear error. Named tunnels (the dashboard-managed kind from steps 1–5 above) don’t have either restriction. Treat quick tunnels as a five-minute demo tool, not something to leave running for real chat sessions.
6. Method 3: Zrok & ngrok (Best for Ephemeral/Quick Sharing)
Sometimes you don’t need a permanent VPN or a dedicated domain. Maybe you’re at a hackathon and want a teammate to hit your local LLM API for an hour, or you’re just testing a webhook.
ngrok remains a very usable option here, and it’s worth correcting a common misconception: ngrok’s free tier does not impose session timeouts, and every free account gets one permanent, automatically assigned “dev domain” (e.g., your-name.ngrok-free.app) that stays stable across restarts — you don’t get a fresh random URL every time you launch it. What the free tier does cap is more modest: up to 3 simultaneous endpoints, 1GB of outbound data transfer per month, and 20,000 requests per month. That’s plenty for short-lived sharing; it becomes limiting for anything sustained.
A newer, fully open-source alternative built on the OpenZiti network is zrok. It recently went through a significant v2 rewrite (referred to as “zrok2”), which renamed the binary and its config directory (zrok2, ~/.zrok2, ZROK2_* environment variables) and replaced the old reserved-sharing model with a namespace-based one.
Setting Up zrok
- Install zrok2 (Homebrew:
brew install zrok2; check zrok’s own docs for other platforms, since third-party package listings for v2 aren’t all current yet). - Request an invite:
bash
zrok2 invite
Signup itself doesn’t require a token — the environment token to activate your local install arrives by email and gets applied via the web console afterward. 3. Enable your environment with the token you receive:bash zrok2 enable <YOUR_TOKEN> - Share your local Ollama port:
bash
zrok2 share public localhost:11434
One thing worth knowing before you run that last command: zrok’sshare publicmode defaults to open permissions — anyone who has the URL can use it, with no additional gate. If you want to restrict access, add--closedand grant specific accounts with--access-grant, rather than assuming a public share is locked down by default. zrok will hand you an HTTPS URL immediately. When you stop the process, the tunnel closes for good. — ## 7. Elevating the Experience: Open WebUI and LiteLLM Exposing the raw Ollama API is great for code, but it lacks the creature comforts of a proper chat interface. Two additional tools round out a remote setup. ### Open WebUI Open WebUI is a self-hosted, ChatGPT-style frontend that runs well in Docker on Apple Silicon. Instead of tunneling Ollama’s port 11434 directly, run Open WebUI on port 8080 and tunnel that through Cloudflare or Tailscale. Open WebUI brings its own authentication, user management, and chat history — a proper remote workstation interface rather than a bare API. ### LiteLLM If you’re building apps remotely and want an OpenAI-compatible endpoint in front of Ollama, put LiteLLM in the middle. LiteLLM translates OpenAI-style API calls into Ollama calls, generates its own API keys for access control, and — beyond just Ollama — can proxy well over 100 different model providers through one unified interface if your setup ever grows beyond a single local model. It’s configured through aconfig.yamlfile and runs on port 4000 by default. You can configure your tunnel to expose LiteLLM’s port, skip the Cloudflare Access login screen specifically for API routes, and instead require a valid LiteLLM API key in the request header — a genuinely solid, self-hosted inference gateway. ### The Docker GPU trap on macOS Here’s a gotcha that catches a lot of people setting this up: Docker Desktop on macOS cannot pass Apple’s GPU through to a container. If you Dockerize Ollama itself on a Mac, it silently falls back to CPU-only inference — no error, just dramatically worse performance, and it’s easy not to notice until you wonder why your fancy M5 Ultra is crawling. The fix is straightforward: run Ollama natively on macOS (as covered above), and only containerize the pieces that don’t need direct GPU access — Open WebUI and LiteLLM both talk to Ollama over the network, so they’re fine in Docker. This limitation hasn’t changed across Apple Silicon generations; it’s a Docker Desktop architecture issue, not a hardware one. — ## 8. Optimizing Your Apple Silicon Host for Always-On Operation If you’re traveling for a week, the last thing you want is for your Mac to sleep and sever the tunnel. To keep things running: 1. System Settings. The path here depends on the machine: on a desktop Mac (Mac Studio, Mac mini) go to System Settings → Energy Saver and turn on “Prevent automatic sleeping when the display is off” — desktop Macs don’t have a Battery pane at all. On a MacBook, the equivalent option lives under System Settings → Battery → Options, and only applies while it’s on AC power. 2. Amphetamine orcaffeinate. Install the free app Amphetamine and set an indefinite “Keep Awake” session, or just runcaffeinate -iin a terminal window you leave open. 3. Auto-start services. Make sure Ollama, Docker (for Open WebUI), andcloudflaredall launch at startup vialaunchd, so a power blip or reboot doesn’t take your tunnel down for good. — ## Quick Comparison | | Tailscale | Cloudflare Tunnel | zrok | ngrok | |—|—|—|—|—| | Best for | Solo/personal access | Web UI + team sharing | Free, ephemeral, OSS | Quick sharing, familiar tooling | | Client needed? | Yes (VPN app), unless using Funnel | No | No | No | | Public URL by default? | No (opt-in via Funnel) | Yes | Yes (open permission by default) | Yes (dev domain) | | Free tier ceiling | 6 users, unlimited devices | Effectively unlimited (self-hosted tunnel) | 5GB/day, 25 environments | 3 endpoints, 1GB/mo, 20K requests/mo | | Streaming (SSE) support | Yes | Not on quick tunnels; yes on named tunnels | Yes | Yes | — ## Conclusion Apple Silicon’s hardware has pulled serious AI inference out of the data center and onto the desk — and with the August 2026 M5 Max/M5 Ultra Mac Studio refresh and Ollama’s new MLX backend, that gap keeps closing. But real infrastructure means taking remote access seriously. Skip port forwarding entirely. Use Tailscale if you’re the only one who needs access and don’t mind installing a client (or reach for Funnel if you occasionally need to share with someone who isn’t on your tailnet). Use Cloudflare Tunnel if you want a proper web address with identity-gated login for a small team — just keep quick tunnels out of anything that streams tokens. Use zrok or ngrok when you need something ephemeral for an afternoon. Whichever you choose, the model stays local. Only the access does the traveling. — ## Changelog Fact-checked against primary sources (official docs, vendor blogs/newsrooms, and direct product pages) on September 19, 2026. Corrections made to the original draft: - Corrected the framing of Ollama and MLX as separate/parallel tools: Ollama 0.19 (preview, released March 31, 2026) now ships a native MLX inference backend for Apple Silicon, toggled viaOLLAMA_USE_MLX=1, requiring 32GB+ unified memory. Added Ollama’s own benchmark context (M5 Max, Qwen3.5-35B-A3B) and the NVIDIA-contributed NVFP4 quantization detail. - Clarified oMLX’s actual scope — it’s a specific coding-agent-focused,mlx-lm-based inference server with continuous batching and a two-tier (RAM/SSD) KV cache and an OpenAI + Anthropic-compatible API — rather than a vague “wrapper” around MLX. - Replaced outdated Mac Studio memory figures (“128GB or 192GB”) with the August 25, 2026 M5 Max/M5 Ultra generation: up to 128GB (M5 Max) / 512GB (M5 Ultra) unified memory, up to 1.2TB/s bandwidth. Noted 512GB configurations didn’t ship until late October 2026, after the September 22 launch. Added Thunderbolt 5 multi-Mac clustering as a new capability. - Updated the single-GPU VRAM comparison from the RTX 4090 (24GB) to the current RTX 5090 (32GB GDDR7), while keeping the underlying point about unified memory’s advantage over discrete VRAM. - Corrected Tailscale’s free-tier claim (“free for up to 100 devices”) to the current (April 2026 pricing overhaul) Personal plan: 6 free users with unlimited self-registered devices per user. Added Tailscale Funnel (beta, all plans) as the answer to the “can’t share with non-Tailscale users” limitation. - Updated Cloudflare’s dashboard navigation from the outdated “Access → Tunnels” / “Access → Applications” to the current “Networking → Tunnels” (moved into the main dashboard in March 2026) with the Zero Trust dashboard’s “Networks → Connectors” as an equivalent path, and noted dashboard-managed (token-based) tunnel creation is now the default, with CLI-basedcloudflared tunnel loginretained as the locally managed alternative. - Added a caveat entirely missing from the original draft: Cloudflare quick tunnels (cloudflared tunnel --url) cap at 200 concurrent in-flight requests and do not support Server-Sent Events at all, which can silently break token streaming from Ollama, Open WebUI, or LiteLLM. - Corrected the framing of ngrok’s free tier as basic/restrictive: free accounts have included one permanent static “dev domain” since 2023 (not a random URL on every restart) and have no session timeout; the actual free-tier caps are 3 endpoints, 1GB/month data transfer, and 20,000 requests/month. - Updated zrok to the current zrok2 release: renamed binary/config/env-var scheme, and corrected the sharing default —zrok share publicuses open permissions by default (anyone with the link), not a closed/private default as implied. Corrected the signup flow:zrok invitedoesn’t require a token up front; the environment token arrives by email after signup. - Added a new section on the Docker Desktop-on-macOS GPU passthrough limitation: Docker Desktop cannot pass Apple’s GPU into a container, so Dockerizing Ollama itself silently falls back to CPU-only inference. This wasn’t mentioned in the original draft at all. - Expanded the LiteLLM section with its actualconfig.yaml/port-4000 setup detail and its 100+-provider scope beyond just Ollama. - Corrected the “prevent sleep” System Settings path from the outdated Displays → Advanced to the current split: Energy Saver on desktop Macs (no Battery pane exists), versus Battery → Options on laptops (AC-only). - Added a Quick Comparison table summarizing all four methods, and stripped repeated bolded keyword phrases (“expose local Ollama to internet,” “reverse proxy for local GPU,” “tunnel Apple Silicon AI,” “secure remote access local LLM”) that were scattered through the original as non-standard SEO scaffolding rather than natural prose.
Related InstaTunnel pages
Continue from this article into the most relevant product guides and workflows.
Related Topics
Keep building with InstaTunnel
Read the docs for implementation details or compare plans before you ship.