Sidecar Proxy Tunnels in DevContainers: The Modern Standard for Secure Local Development
Quick answer
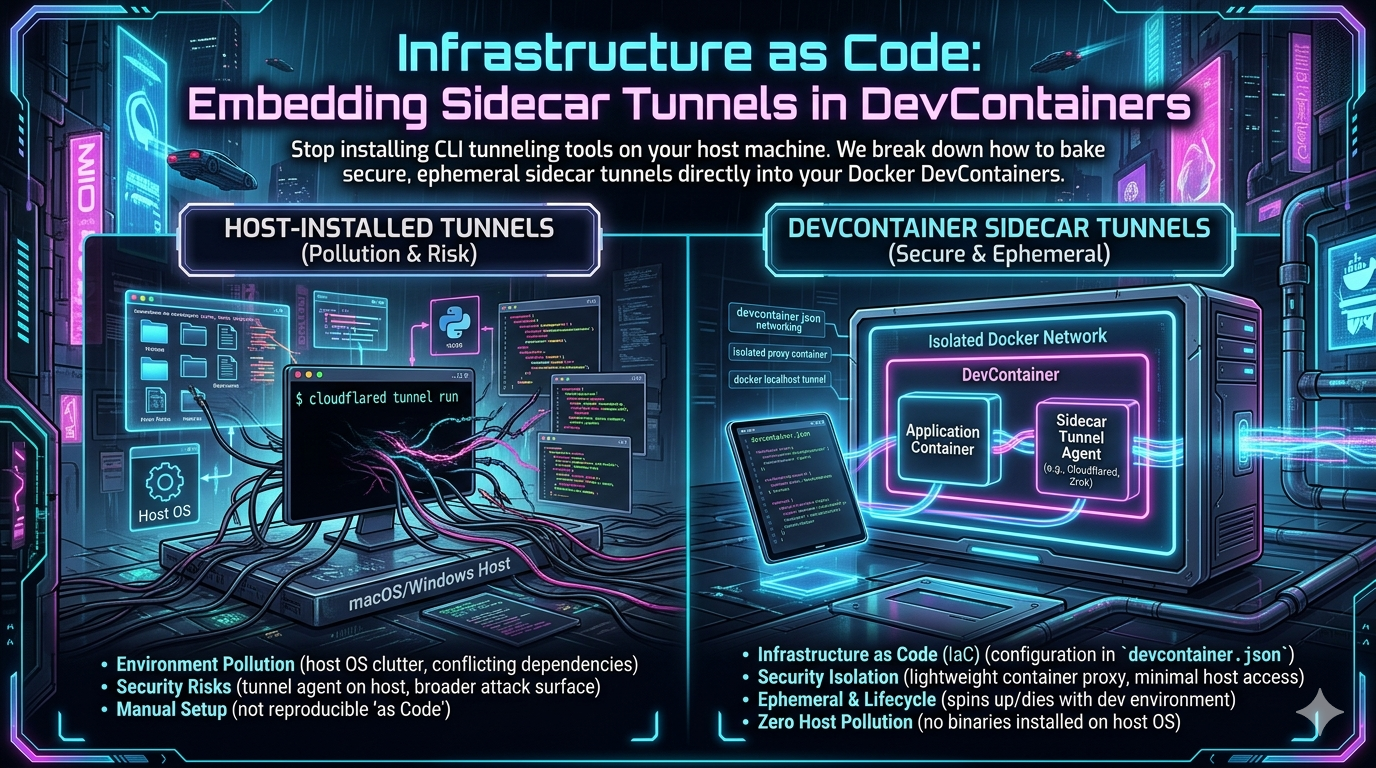
Infrastructure as Code: Embedding Sidecar Tunnels in DevCont: webhook testing answer
For local webhook testing, run your app locally, expose it with a public HTTPS tunnel, and paste the stable callback URL into the provider dashboard.
How do I test webhooks on localhost?
Start your local server, open a public HTTPS tunnel to that port, configure the provider webhook URL, and inspect events in your local logs.
Why does a stable webhook URL matter?
Stable URLs prevent provider dashboards from needing manual callback updates every time you restart a tunnel.
Stop installing tunneling tools on your host machine. The practice of running ngrok, cloudflared, or any other tunneling daemon as a rogue process on your laptop is an anti-pattern that belongs in the past. In 2026, the correct approach is to codify your entire network topology — including public tunnel access — inside your devcontainer.json. This guide covers how to do it right, which tools to choose, and why this architectural shift matters.
Why the Old Way Breaks Down
The classic developer workflow looks like this: clone a repo, install dependencies, install ngrok globally, spin up a tunnel, paste the URL somewhere, and repeat every time the session expires. It works — until it doesn’t.
The problems compound as teams grow:
- Non-reproducibility. The tunnel tool version on your machine differs from your colleague’s. Behaviour diverges. Bugs get blamed on the wrong layer.
- Security drift. A globally installed daemon with network access sits on your host OS, outside any container boundary. Its credentials are stored in your home directory, often unencrypted.
- Port collisions. Hardcoded ports like
3000or8080conflict between projects. You start remembering which project owns which port. This is not engineering; it is archaeology. - Onboarding friction. Every new developer needs a separate setup guide just for the tunnel tool. That guide goes stale.
The DevContainer specification, maintained jointly by Microsoft and the broader community, solves this at the environment level. By defining a dockerComposeFile in devcontainer.json alongside a sidecar service, you make the tunnel a first-class, versioned component of your software supply chain — ephemeral by default, reproducible by design.
The Architecture: Sidecar Containers Explained
The sidecar pattern originates from microservices architecture. A sidecar is a secondary container that runs alongside your primary application container, sharing its network namespace, but handling a distinct operational concern — in this case, tunneling. Your application code never touches the tunnel. The tunnel never touches your application code. Both are disposable; neither is a snowflake.
In Docker Compose terms, the layout looks like this:
.devcontainer/
├── devcontainer.json
├── docker-compose.yml
└── (optional) Dockerfile
The primary app service runs your code. The tunnel sidecar — whether cloudflared, zrok, or an alternative — runs as a dependent service, starts after the app is healthy, and terminates cleanly when the Compose stack is torn down.
Option 1: Cloudflare Tunnel (cloudflared)
Cloudflare Tunnel, accessed via the cloudflared daemon, is the most widely deployed option for teams that already use Cloudflare for DNS. It establishes outbound-only connections to Cloudflare’s edge network, requiring no inbound firewall rules or public IP addresses.
Getting Your Token
Create a named tunnel through the Cloudflare Zero Trust dashboard. During setup, Cloudflare generates a TUNNEL_TOKEN. Copy it immediately — it will not be shown again. Store it as a local environment variable or in your secrets manager (GitHub Codespaces secrets, GitLab CI variables, etc.), never in the repository.
docker-compose.yml
version: '3.8'

services:
  app:
    image: mcr.microsoft.com/devcontainers/node:20
    volumes:
      - ../:/workspace:cached
    command: sleep infinity
    healthcheck:
      test: ["CMD", "curl", "-f", "http://localhost:3000/health"]
      interval: 10s
      timeout: 5s
      retries: 5
      start_period: 15s

  cloudflared:
    image: cloudflare/cloudflared:latest
    command: tunnel --no-autoupdate run
    environment:
      - TUNNEL_TOKEN=${CLOUDFLARE_TUNNEL_TOKEN}
    depends_on:
      app:
        condition: service_healthy
    restart: unless-stopped
    logging:
      driver: "json-file"
      options:
        max-size: "10m"
        max-file: "3"
devcontainer.json
{
  "name": "Node.js + Cloudflare Tunnel",
  "dockerComposeFile": "docker-compose.yml",
  "service": "app",
  "workspaceFolder": "/workspace",

  "remoteEnv": {
    "CLOUDFLARE_TUNNEL_TOKEN": "${localEnv:CLOUDFLARE_TUNNEL_TOKEN}"
  },

  "customizations": {
    "vscode": {
      "extensions": [
        "dbaeumer.vscode-eslint"
      ]
    }
  }
}
The ${localEnv:VARIABLE_NAME} syntax tells the DevContainer engine to read the value from the developer’s host environment at startup and inject it into the Compose context. No credentials ever touch the repository. The tunnel authenticates, connects, and is ready before your first npm run dev.
Security note: Always set
network_modefor thecloudflaredcontainer to communicate only through the internal Docker network — not withnetwork_mode: host. This ensures the tunnel sidecar can reach theappcontainer by service name but cannot directly probe the host’s network stack.
Option 2: Zrok — Zero-Trust Ephemeral Tunnels
While Cloudflare dominates in managed environments, zrok — built on the OpenZiti zero-trust networking overlay — has gained significant traction for developers who want complete infrastructure control or fully ephemeral, disposable URLs. Zrok reached its 1.0 milestone in late 2025, bringing with it a new Agent console, reserved share persistence, and expanded self-hosting options via Docker Compose with Caddy for automatic TLS.
The key differentiator: when you stop a zrok share, that URL is gone immediately. There is no lingering DNS record, no zombie tunnel, no orphaned credential. For a DevContainer context — which is itself ephemeral — this is precisely the right behaviour.
Zrok also supports private shares, where resources are never exposed to any public endpoint and all communication is end-to-end encrypted between zrok clients. This is useful for team-internal review environments where you do not want a public URL at all.
docker-compose.yml
version: '3.8'

services:
  app:
    image: mcr.microsoft.com/devcontainers/python:3.11
    volumes:
      - ../:/workspace:cached
    command: sleep infinity
    healthcheck:
      test: ["CMD", "curl", "-f", "http://localhost:8000/"]
      interval: 10s
      timeout: 5s
      retries: 5
      start_period: 20s

  zrok-sidecar:
    image: openziti/zrok:latest
    environment:
      - ZROK_ENABLE_TOKEN=${ZROK_TOKEN}
    depends_on:
      app:
        condition: service_healthy
    command: >
      sh -c "zrok enable $$ZROK_ENABLE_TOKEN &&
             zrok share public http://app:8000 --headless"
When the stack starts, the sidecar enables the zrok environment using your token, then immediately provisions a temporary public URL routing to the Python application on port 8000. The URL is printed to the container logs. When docker compose down is called, the zrok process terminates and the share is destroyed.
To retrieve the generated URL, inspect the sidecar logs:
docker logs <project>-zrok-sidecar-1
Or configure the sidecar to write the URL to a shared volume that your postStartCommand can read and echo to the VS Code terminal.
Option 3: pgrok — Self-Hosted Multi-Tenant Tunnels
For teams that want enterprise-grade tunneling without the enterprise price tag, pgrok delivers an SSH-based multi-tenant solution you host on your own domain. It supports OIDC authentication, meaning developers authenticate through your existing SSO provider (Okta, Auth0, Google Workspace, etc.) before a tunnel URL is issued. The resulting URLs follow the pattern https://feature-x.alice.dev.example.com — stable, human-readable, and scoped to the individual developer. A Kubernetes operator can inject pgrok as a sidecar automatically, giving every pod a reviewable URL with zero per-pod configuration.
For teams already operating a domain and an SSO provider, this delivers most of the “enterprise ngrok” experience with infrastructure costs in the range of a few dollars a month.
The Tunneling Tool Landscape in 2026
The competitive pressure on ngrok has intensified. In February 2026, the DDEV open-source project opened an issue to consider dropping ngrok as its default sharing provider, citing the tightened free-tier limits. The market has responded with viable alternatives at every price point:
| Tool | Model | Best For | Free Tier |
|---|---|---|---|
| Cloudflare Tunnel | Managed SaaS | Teams on Cloudflare DNS | Yes (generous) |
| zrok | Open source / SaaS | Ephemeral, zero-trust, self-hostable | Yes |
| pgrok | Self-hosted | Teams with own domain + SSO | Infrastructure cost only |
| Tailscale Funnel | Mesh VPN | Private team access, WireGuard-based | Yes (personal) |
| Inlets | Self-hosted / SaaS | Kubernetes-native, Prometheus metrics | No ($25+/month) |
| ngrok | Managed SaaS | Well-documented, widely supported | Restricted in 2026 |
For webhook testing specifically — the most common DevContainer use case — both Cloudflare Tunnel (persistent named URL) and zrok (ephemeral URL per session) are strong choices. Cloudflare wins when you need to configure a webhook endpoint in a third-party service (Stripe, GitHub) once and leave it. Zrok wins when you want zero persistent state and maximum isolation per session.
Best Practices
1. Always Use Health Checks and depends_on Conditions
The single most common failure mode in sidecar tunnel setups is the tunnel coming online before the application finishes booting, resulting in 502 Bad Gateway errors during the startup window. The fix is explicit health checks on the app service and condition: service_healthy in the sidecar’s depends_on block. This is not optional.
depends_on:
  app:
    condition: service_healthy
Without this, Docker Compose only guarantees container start order, not application readiness.
2. Avoid Hardcoded Host Port Mappings
If you are routing traffic through a sidecar tunnel, you do not need to expose container ports to the host with ports: - "3000:3000". Remove those mappings. This eliminates port collision entirely — a different project can use port 3000 on the same machine without conflict. If you also need local browser access during development, use VS Code’s built-in port forwarding feature rather than a static Docker port map.
3. Secure Secret Injection
The ${localEnv:VARIABLE_NAME} pattern in devcontainer.json is the correct approach for all environments. For GitHub Codespaces, store your CLOUDFLARE_TUNNEL_TOKEN or ZROK_TOKEN in the Codespaces user secrets interface — they are automatically injected as environment variables into the Codespace at startup, where ${localEnv:...} picks them up. Never write tokens to .env files that are tracked by git. Add .env to .gitignore and treat it as a local-only file.
4. Log Visibility for Sidecar Containers
Because the sidecar runs as a background container, its logs do not appear in your primary VS Code terminal. Developers need to actively fetch them. There are three practical options:
- Use the Docker extension in VS Code to tail individual container logs from the sidebar.
- Run
docker logs <project>-<sidecar-service>-1 --followin a host terminal. - Configure a
postStartCommandindevcontainer.jsonthat reads a URL written by the sidecar to a shared volume and echoes it to the terminal.
The third option gives the best developer experience — the public URL appears in the VS Code terminal automatically on container start, without any manual log inspection.
5. Pin Image Versions in Production Teams
For individual experimentation, cloudflare/cloudflared:latest or openziti/zrok:latest is fine. For team DevContainers checked into a repository, pin to a specific digest or version tag. This prevents a silent upstream image update from breaking everyone’s environment simultaneously, especially relevant given that both cloudflared and zrok release frequently.
image: cloudflare/cloudflared:2025.2.0
Putting It All Together: A Complete Workflow
Here is the end-to-end developer experience when this is set up correctly:
- Developer clones the repository.
- VS Code detects
.devcontainer/devcontainer.jsonand prompts to reopen in container. - Docker Compose brings up the
appcontainer and the tunnel sidecar. - The
appcontainer runs its health check; once healthy, the sidecar starts. - The sidecar authenticates, provisions the tunnel, and writes the public URL to a shared volume.
- The
postStartCommandreads the URL and echoes it to the integrated terminal. - The developer sees something like
https://my-project.example.comin their terminal within seconds of the environment loading. - They paste that URL into Stripe’s webhook configuration and start coding.
- When they run
Ctrl+Cand the container stops, the tunnel is destroyed. No cleanup required.
No host-installed tools. No manual token management. No port collisions. No stale URLs left pointing at a laptop that has since closed its lid.
Conclusion
The DevContainer sidecar proxy pattern is not a niche architectural curiosity — it is the correct way to handle localhost tunneling in 2026. Whether you choose Cloudflare Tunnel for its managed reliability, zrok for its zero-trust ephemeral model, or pgrok for full infrastructure ownership, the principle is the same: tunneling infrastructure belongs inside the container definition, version-controlled alongside the application code, not installed ad-hoc on a developer’s host machine.
The result is faster onboarding, better security posture, reproducible networking behaviour, and an end to the “works on my machine” class of tunneling bugs. Docker was designed to encapsulate exactly this kind of operational concern. Use it.
Related InstaTunnel pages
Continue from this article into the most relevant product guides and workflows.
Related Topics
Keep building with InstaTunnel
Read the docs for implementation details or compare plans before you ship.